
Having a sticky menu on your WordPress website can be very helpful because it keeps the menu in sight while the visitors scroll up and down.
This can improve your metrics, such as click-through rate, page views, and bounce rate.
If your WordPress theme doesn’t have a built-in option to make your menu sticky, then you can use a simple plugin.
Create a sticky menu in WordPress
Step 1: Install a plugin
Install the plugin called myStickymenu.
On some WordPress themes, this might work out-of-the-box.
So, if you’re satisfied with the default sticky menu, you’re done!
If not, check the next steps.
Step 2: Tweak the settings
Go to Settings > myStickymenu to access the plugin’s settings.
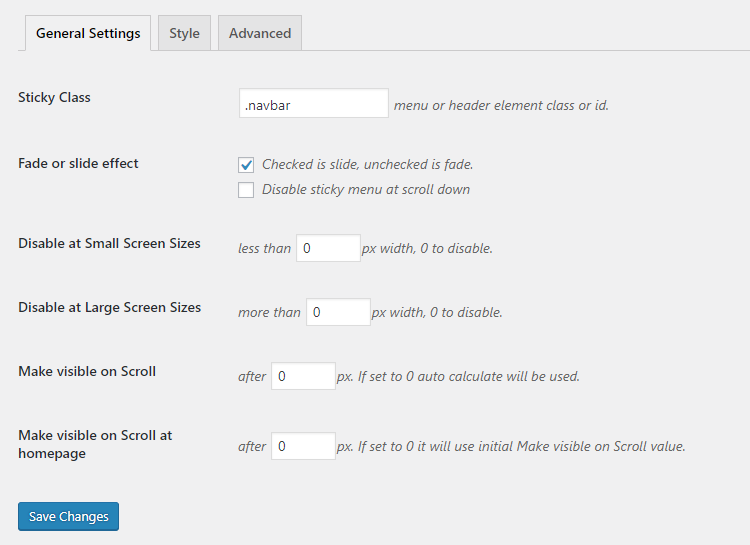
General Settings tab
The most important part here is the Sticky Class.
The .navbar CSS class is set by default, but not all WordPress themes have that class defined for their navigation menu.
So, if your WordPress menu doesn’t become sticky, you’ll have to find the correct CSS class for it.
Here’s how to find the CSS class:
1. Right-click outside the menu’s contained area to get the navigation class highlighted right from the start.
Example: Your first menu item should be “Home”. Go further left and right-click there.
Then, click on Inspect or Inspect Element (depends on the browser).

2. At the bottom, a new window will pop up with the selected element’s source code.
If you right-clicked on the right spot, you should get the navigation element selected, along with the CSS class inside of it.
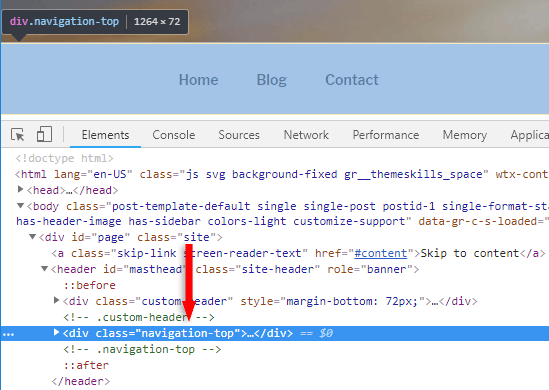
As you can see, both the navigation menu and its code were highlighted in blue.
In my case, the CSS class of the navigation menu is navigation-top.
3. Add the CSS class in General Settings > Sticky Class.
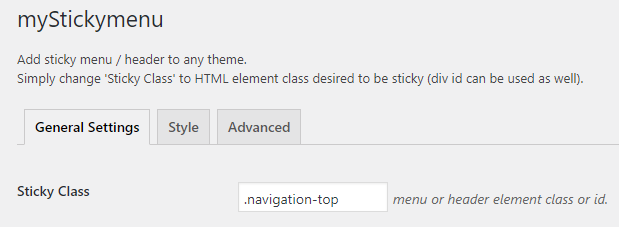
Don’t forget to add a dot before the class.
In case your theme uses an id, not a class, then add the # sign (e.g. #navigation-top) instead of a dot.
Style tab
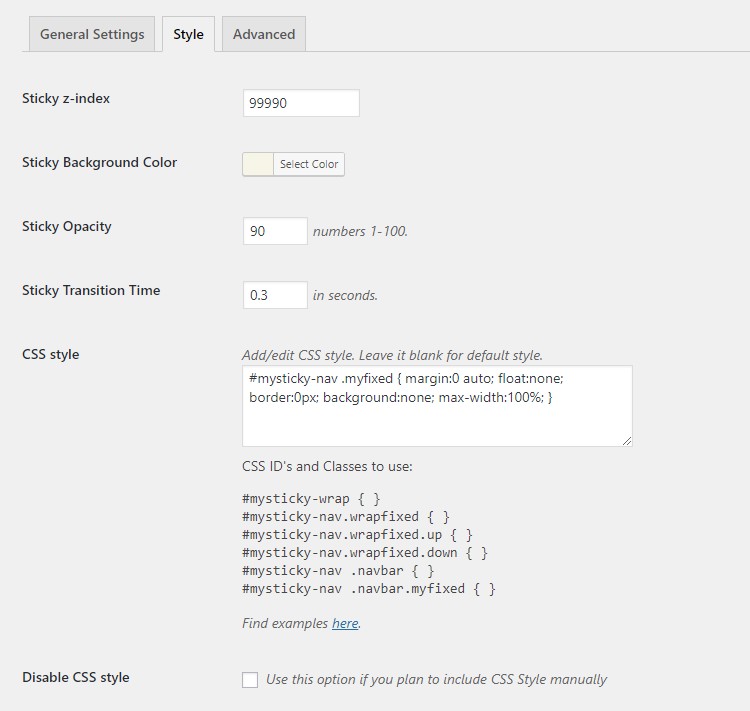
In the Style section, you have some design options available.
The Sticky z-index should only be modified in case the sticky menu doesn’t appear on top of everything else.
If some other elements appear on top of the sticky menu, then you should increase the number in Sticky z-index until the issue goes away.
Advanced tab
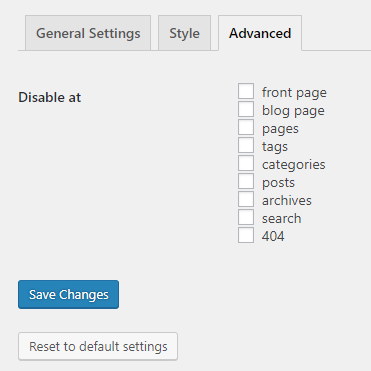
In the Advanced tab, you can disable the sticky menu in certain areas of your WordPress website, or reset the plugin to its default settings.
Step 3: Check your sticky menu
After you’ve finished modifying the settings, check out the front-end and see how your WordPress sticky menu works and looks like.
If you’re interested, I’ve also written tutorials on how to create a sticky sidebar in WordPress and how to create a sticky widget in WordPress.
That’s a wrap
Hope you found the post useful and comprehensive, and you’ve successfully created a sticky menu in WordPress!
Don’t forget to share the post to help out others!
You can quickly subscribe to my newsletter by using this link.
If you have any questions or thoughts, drop a comment or send a message via contact or Facebook page.
You can also hit the follow button on Twitter and subscribe to the YouTube channel.
My WordPress website services are at your disposal!

Leave A Comment