This post was last updated on 5/27/2019
Nowadays, it’s being debated whether or not sidebars have become useless, especially because most users have developed sidebar blindness.
The only way to find out what’s the best option for you is to do some A/B testing for a while and compare the results.
There’s one thing that could improve the effectiveness of your WordPress sidebar, though, and that’s to make it sticky.
By making it sticky means it will float on the side of your content while the users scroll up and down, without disappearing.
Thus, increasing the chances of users noticing whatever widgets you’ve added there.
So, in this tutorial, I’ll show you how to create a sticky sidebar in WordPress!
If you only want to make a specific widget sticky, then check out this tutorial.
Create a sticky sidebar in WordPress
You can either watch the video or read the post. If the sidebar won’t be sticky, then read the solution at the bottom.
To make a sidebar float in WordPress as the users scroll through your post, you’ll have to install a plugin called WP Sticky Sidebar.
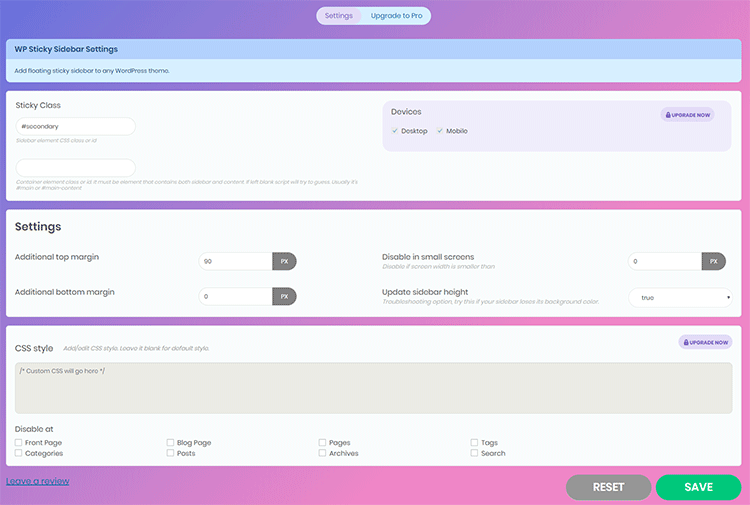
After you install it, you can access its settings in Settings -> WP Sticky Sidebar.

As you can see, it doesn’t have a lot of settings, and it should normally work fine for most of you right after you’ve installed it.
The plugin’s options depend on your personal preferences.
You can disable the sticky sidebar on pages, categories, tags, etc.
You can also set the top and bottom margin, and disable it on smaller screens by adding something like 769 (px) in the Disable in small screens field. This will take care of both tablets and smartphones.
Check your theme’s settings first to see if it has a feature that will allow you to make your WordPress sidebar sticky.
There’s no use adding a plugin if your WordPress theme already offers such a feature.
If the WordPress sticky sidebar won’t work
In most cases, you won’t have to change anything because most WordPress themes will usually use #secondary as the sidebar CSS id, and #main, #main-content or #primary as the content CSS id, which the plugin can guess by itself.
But, if your WordPress theme is using different, uncommon CSS classes or ids that the WP Sticky Sidebar plugin can’t guess, then you’ll need to find them and add them in Sticky Class fields.

To do that, you’ll have to inspect your post’s and sidebar’s source code.
Step 1
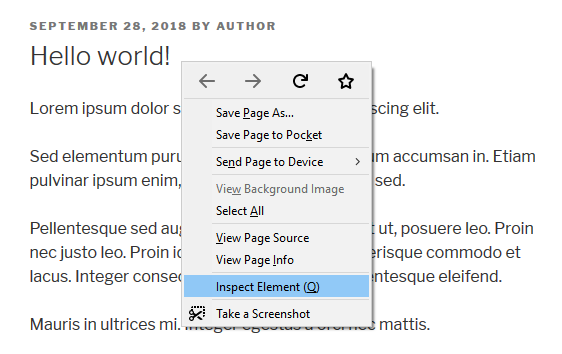
Right-click somewhere at the top of your post (not above it) and click on Inspect or Inspect Element (depends on the browser).

Step 2
A box will appear at the bottom.
Scroll inside of it nice and easy (most likely up), while hovering your mouse cursor over each line of code.
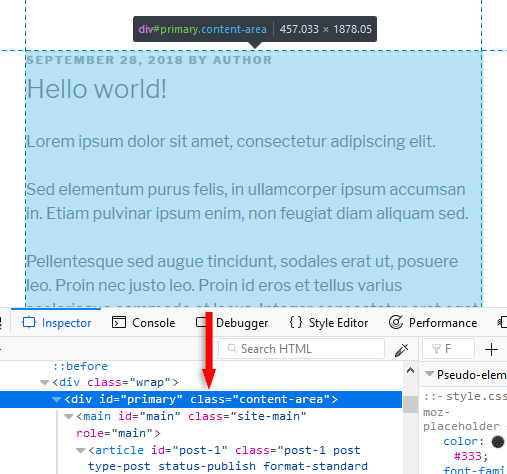
You’ll notice that every line of code will add a blue-ish highlight on your post, depending on what section the code represents.
Scroll in there until your whole post is highlighted and until you’ll find something like this:

Since I’m using the default Twenty Seventeen theme as an example, everything is as it should be.
The post’s content id is #primary, therefore the WP Sticky Sidebar plugin automatically recognized it, so I don’t need to add it in the settings.
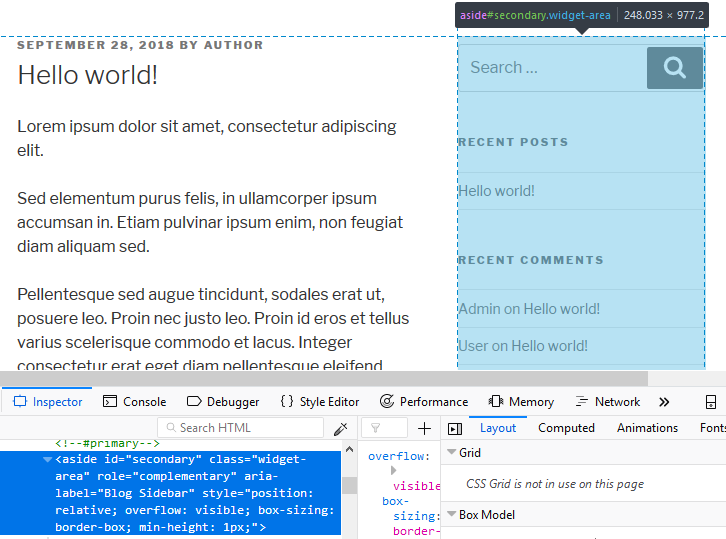
Repeat the process for the WordPress sidebar. It should be easier to figure out because a well-coded theme will use the <aside> tag for it.

Now, your code can look very different than the one in the screenshots, so it can be hard for your to figure things out.
In that case, I recommend asking for some WordPress help.
That’s a wrap
I hope you found the post useful and comprehensive, and you managed to make your sidebar sticky in your WordPress blog!
Don’t forget to share the post to help out others!
You can quickly subscribe to my newsletter by using this link or the subscription form.
If you have any questions or thoughts, drop a comment or send a message via contact or Facebook page.
You can also hit the follow button on Twitter and subscribe to the YouTube channel.
My WordPress website or blog installation service is at your disposal!
On-going WordPress support and maintenance service is on the menu as well!


Hi? Is it applicable in all themes? I used Mercia by ThemeZee on my site (Check it out here
https://www.frontonet.com)I am using their free version. It would be a great help. Thanks :)
Hello!
It should work with almost all themes. If it doesn’t, it means that you need to find the proper CSS id or class, as you can see in the tutorial, or there’s something in the theme’s code that prevents it to work properly. I did find a theme where the plugin just didn’t work due to the theme’s design. I ended up using a sticky widget instead.
Hi. Thank you for suggesting sticky widget. I tried my best but looks like it doesnt working on my theme, maybe i need to try it on other themes. Or maybe, to save time, install sticky widget. Thanks :)
It looks like the WP Sticky Sidebar plugin has been removed from the WordPress repository. I contacted the developers to find out why.
Hi,
I have a basic problem. I do not want the sidebar to scroll down initially. I want it to start scrolling when i move down on my page. – TO a point where the remaining page’s height = Height of the Sidebars.
Can that be solved ?
Hello! It could be done, I think, but with some custom coding, not with this plugin.