Just installing WordPress and a theme won’t be enough.
You’ll need to start installing plugins as well, especially essential plugins, which will make your WordPress website more optimized, secure, fast, and so on.
In this article, I’ll show you how to install them using 3 different methods.
1. Installing a plugin in WordPress using the search feature
Click here if you want to jump straight to the video tutorial.
What you need to do:
1. Go to Plugins -> Add New.
2. In the Search plugins… field, type a keyword (e.g. “gallery” to get all the gallery related plugins) or the name of the plugin you want to install.
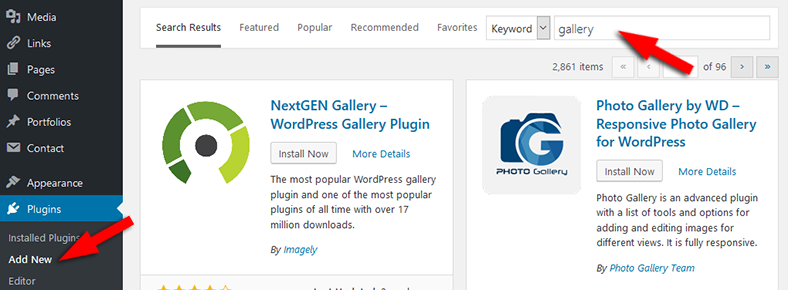
3. Press the Install Now button on the plugin that you want to install.
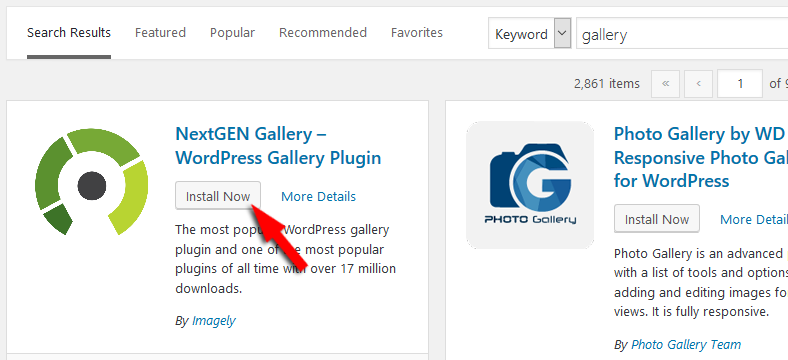
4. Wait for the plugin to get installed and then press the Activate button – upon activation, you’ll be automatically sent to the Plugins area.
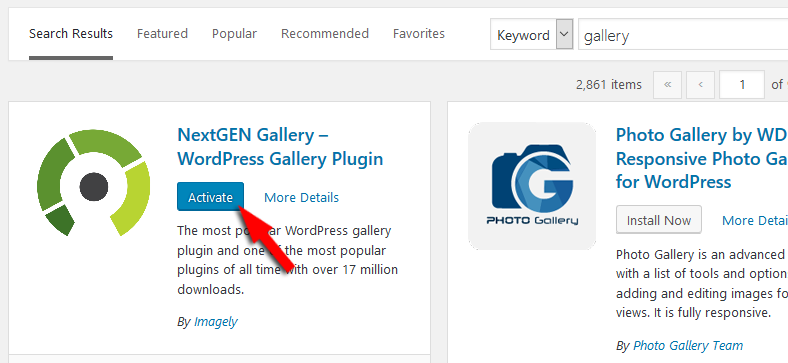
Now you can go and configure its settings if it has any.
If you can’t find a specific plugin, it means that it’s not in the WordPress plugin repository, so you’ll have to download it from another source and upload it yourself, as you’ll see below.
2. Installing a plugin in WordPress using the upload feature
What you need to do:
1. Download your plugin from the source – the file should be a .zip, and make sure you upload the installable .zip, which only contains the plugin files.
2. Go to Plugins -> Add New.
3. Press Upload Plugin.
4. Press the Browse button and select the plugin.
5. Press Install Now.
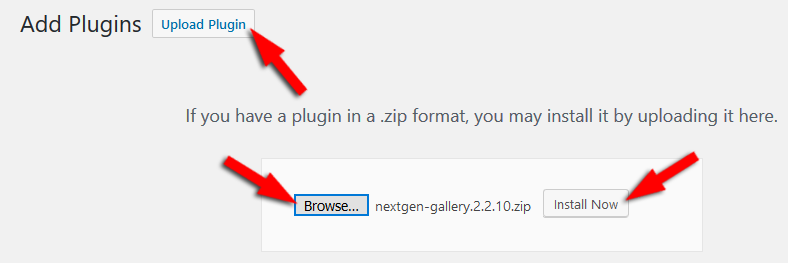
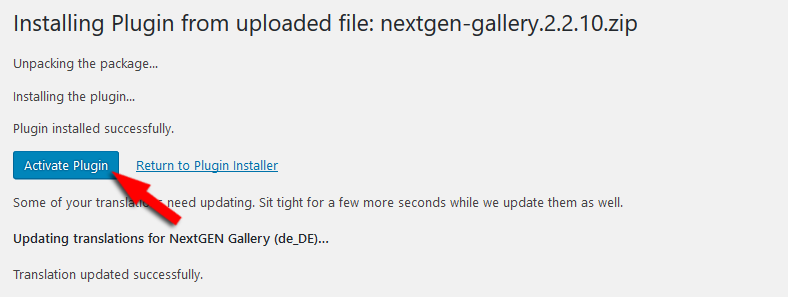
6. Wait for the plugin to get installed and then press Activate Plugin.
3. Installing a plugin in WordPress via FTP
This part is a bit more tricky, especially for beginners.
First of all, you need to access your FTP. That’s usually the hardest part for most beginners.
I’ll use cPanel as an example, because it’s easier, at least for me, but the process is quite similar to a 3rd party software too. You just need to upload and unzip.
So, once you’re in your FTP:
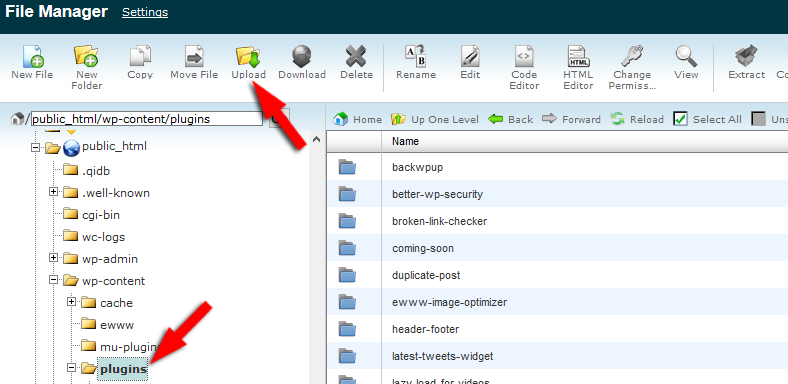
1. Select the /plugins/ folder, which is by default found in public_html -> wp-content -> plugins.
2. Press the Upload button.
3. Browse for the file, select it and upload it.
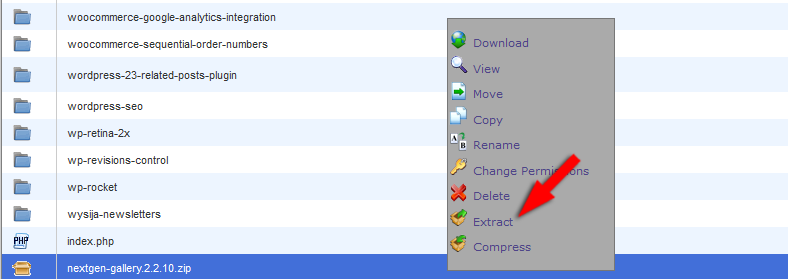
4. After you uploaded it, the .zip file should be in your plugins folder. Right-click on it and select Extract.
5. The plugin will be extracted/installed, and you can delete the .zip file.
6. All that you have to do now is to go to Plugins -> Installed Plugins and click the Activate link.

That’s it for the 3rd and last method.
Enjoy your plugins!
That’s a wrap
Hope you found the post useful and comprehensive.
Don’t forget to share it with your friends!
If you have any questions or thoughts, drop a comment, contact us, or message us on Facebook.

Nice article on WordPress plugin installation. Information in the article is very informative for any prominent blogger or newbie.
Great job on blogging.