Either if it’s for styling purposes or a plugin requires it, at some point, you’ll find yourself in a situation where you’ll need to use a CSS class or id.
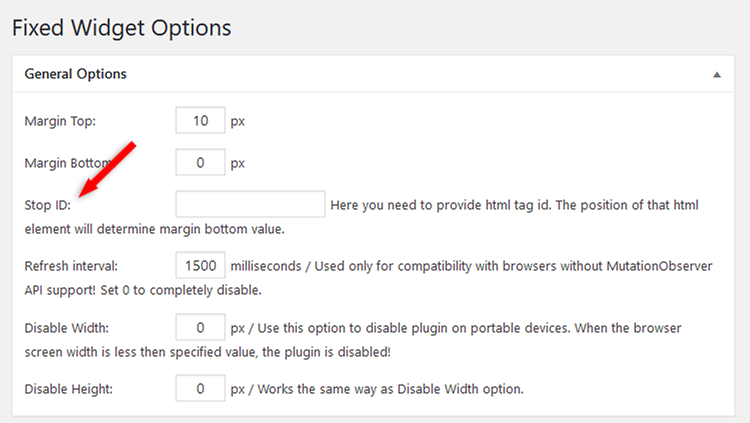
For example, if you’re using the “Q2W3 Fixed Widget for WordPress” plugin to create a sticky widget, then you’ll most likely need to add a Stop ID, so the widget won’t persist even when the user reaches the footer area.
So, in this tutorial, I’ll show you how to find and copy a CSS class or id selector, along with other useful information!
Let’s get to it!
1. Finding a CSS Class or Id in WordPress
The process is the same for both of them! The only thing that differs is the selector that you’ll find.
Step 1 – Inspecting the element
Let’s say you want to find out the CSS class or id of a blog post’s entry title.
Right-click anywhere on it and select Inspect or Inspect Element (depends on the browser).

It’s important to click exactly on it to avoid looking for it in the code. If you’re a beginner, it might become frustrating.
Step 2 – Spotting the CSS class or id
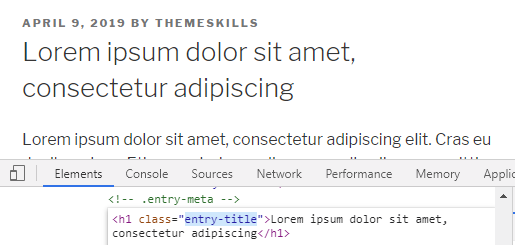
After that, a window will appear at the bottom with that element’s HTML code.
If you clicked exactly on it, you’ll most likely get it highlighted right from the start.
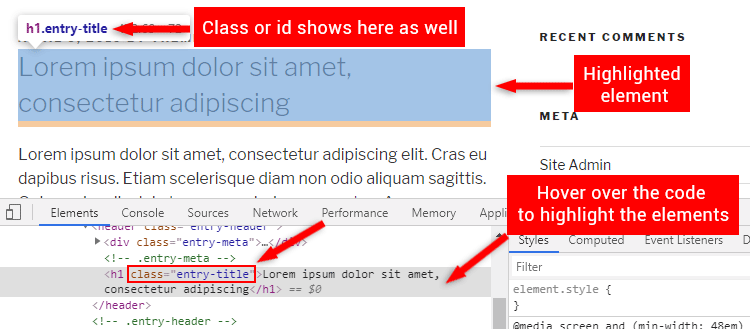
As you can see in the image, the element’s HTML code was highlighted in gray.
In that code, there’s a class for the element, named entry-title.
If it would have been an id instead, it would have displayed as id="entry-title".
That CSS class is also displayed on the element itself, which is highlighted in blue, above the window with the code.
Note that the highlight colors might differ from browser to browser.
What if you don’t get it right from the start?
If you right-click on an element, but it doesn’t highlight the one that you want, just hover your mouse over the HTML code and look at what’s getting highlighted in blue above.
When the element that you want gets highlighted above, click on the HTML code line to select it.
2. Copying the CSS Selector
To copy the CSS selector, right-click on the HTML code and select Edit as HTML.
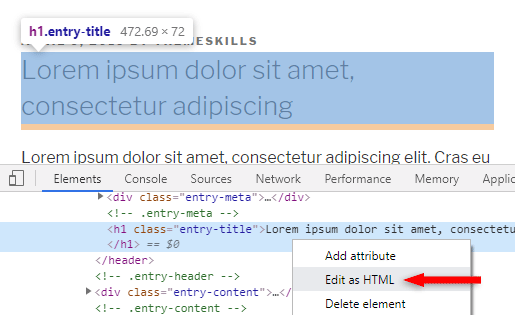
Then, select the CSS class or id and copy it.
As you can see, you only need to copy what’s between the quotes.
Now, you can use the CSS selector in WordPress.
If it’s a class, you’ll have to add a dot in front of it:
.example{color: #000;}If it’s an id, you have to add a # sign:
#example{color: #000;}What if the element has both id and class selectors?
Sometimes, you’ll find something like this:
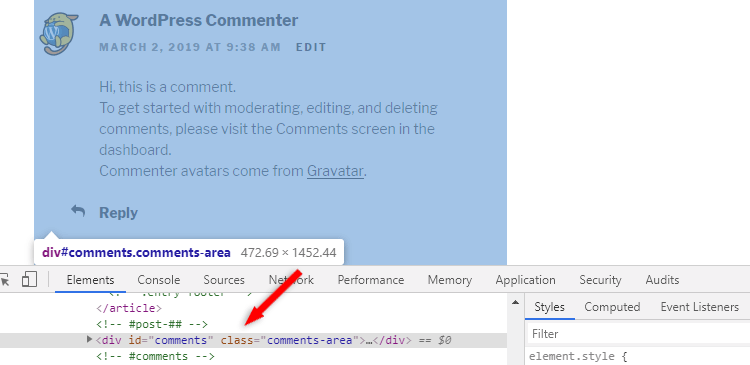
I recommend getting the id because an HTML element can only use one.
On the other hand, an element can have multiple classes, which can confuse you if you are completely new to CSS.
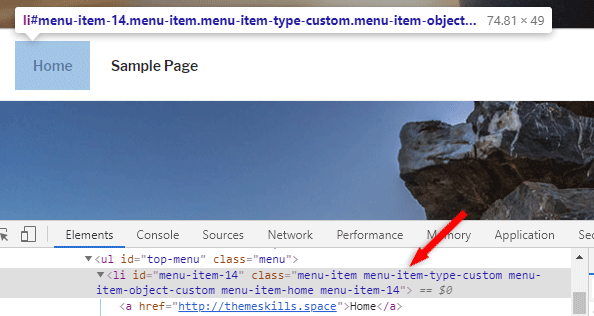
As you can see, this menu item has a lot of classes attributed to it, but only one id.
So, by going for the id will save you the hassle of finding out the right class for it.
What if there are only CSS classes?
You can also find something like this:
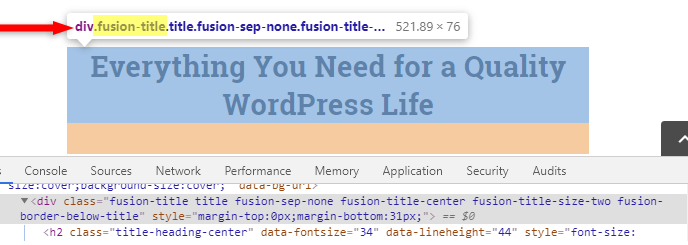
No ids, only multiple classes.
Your best bet here is to hover your mouse cursor over the element’s HTML code and look at the CSS classes from the highlighted element that’s above (see above image).
Then, use the first class. In most cases, that will work.
I recommend using Chrome for this, for better accuracy.
Sometimes, you might need to combine multiple selectors, but that depends from case to case. I can’t provide a one-size-fits-all example, unfortunately.
Notes
1. If you happen to somehow delete a class while copying it or something like that, you might see some modifications to your website. Don’t panic!
The changes won’t apply to your website, only in your browser, and they’ll revert after you refresh the page.
2. After you use the CSS selectors in WordPress, clear your site and browser (or use an Incognito/Private window) cache if the changes won’t appear after simply refreshing the page.
3. If the changes don’t appear even after you cleared the cache, try adding !important to the CSS code and clear the cache again.
.example{color: #000 !important;}That’s a Wrap
I hope you found my tutorial useful and comprehensive, and you managed to find the CSS selector(s) that you needed for your WordPress website!
If you have any questions or thoughts, drop a comment or send a message via contact or Facebook page.
You can also hit the follow button on Twitter and subscribe to the YouTube channel.
Don’t forget to share the post to help out others!

Leave A Comment