
In this tutorial, I’ll show you how to create a simple “Related Posts” feature in WordPress using CSS.
Yes, we won’t use a plugin for this, and I’ll tell you below the reasons why.
The kind of Related Posts feature I’m talking about is not the one where you have a box all the way at the bottom of the blog post.
I’m talking about a manually placed Related Post box, like this:
This is what I use on this blog.
You’ve probably seen something similar on other blogs as well.
Why not use a plugin to display Related Posts in WordPress?
Speed: Related Posts plugins have to perform a lot of database queries to find similar posts to display, which will affect your WordPress site’s performance.
Relevancy: No matter how advanced the plugin might be, you’ll still do a better job at adding links to posts that are more relevant for the readers.
Positioning: Adding a Related Posts box all the way at the bottom is usually pretty useless. Most readers don’t even scroll all the way down there.
With this method, you can add them wherever you see fit.
Bounce Rate & Page Views: If you add useful, relevant related posts in key points inside the article, it’s most likely for users to notice and click on them, improving your bounce rate a lot more.
I managed to improve my bounce rate by 7% after implementing this Related Posts feature.
It’s not that much, yes, but that’s because of my type of blog.
People don’t hang out much on tutorial blogs. They normally get the solution and leave.
But it’s understandable. No one wants to stay and read solutions to the problems that they don’t have, right? :)
It’s not like a Marketing or SEO blog where almost every piece of information is useful and worth reading.
Create a Related Posts feature in WordPress using CSS
Step 1 – Add the CSS code
Add this CSS code in WordPress:
Here are different ways to add CSS in WordPress. The easiest way is to add it in Appearance > Customize > Additional CSS.
That code will create a design for a Related Posts box like mine, the one I showed above.
Don’t worry, you can change its design, and I’ll show you how below.
But now, let’s see how to make this code work.
Step 2 – Add the CSS class to make the Related Posts box appear
In the above CSS code, the class is custom-related-posts (you can change it, as you’ll see below).
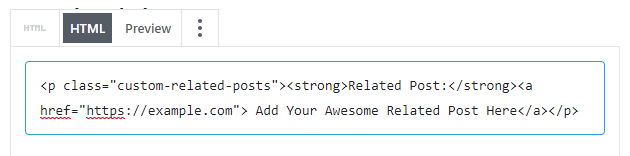
Now, when you’ll want to insert the Related Posts feature inside one of your WordPress articles, you’ll have to add this HTML code with the CSS class in it:
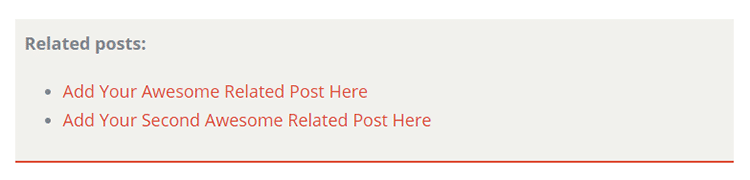
And you’ll get something like this:

Don’t forget to add your own post’s URL instead of https://example.com and the post’s title instead of Add Your Awesome Related Post Here.
How to add the HTML code
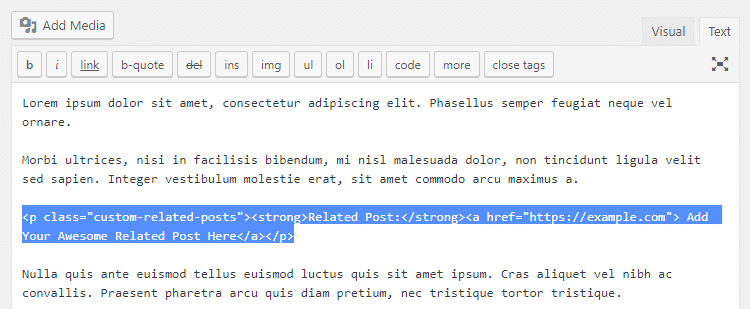
If you still use the Classic Editor, then you’ll need to switch to the Text editor and paste it there.
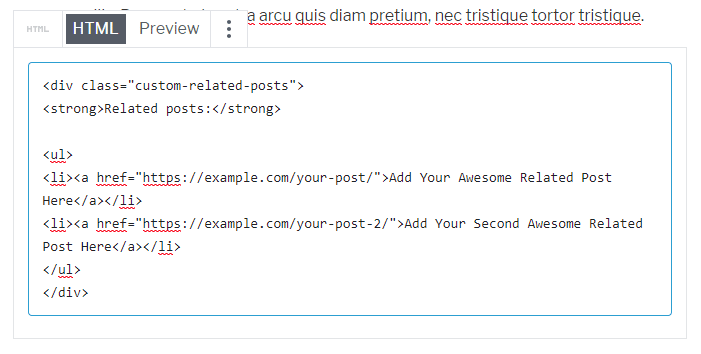
If you use Gutenberg, you need to click the + sign, search for the Custom HTML block, add it, then paste the code there.
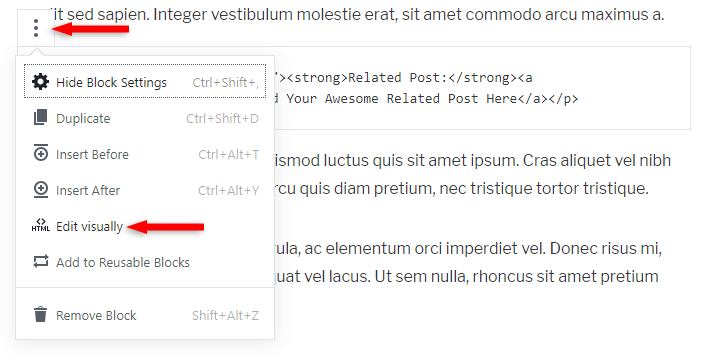
Or, you can add your related post in a Paragraph block and then edit the block as HTML.
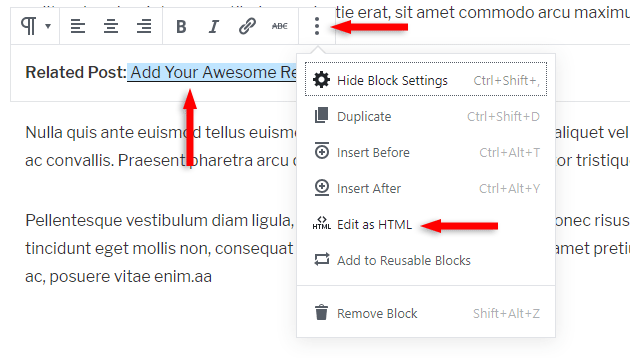
Then, just add the CSS class (class="custom-related-posts") in the <p> tag that will be there by default.
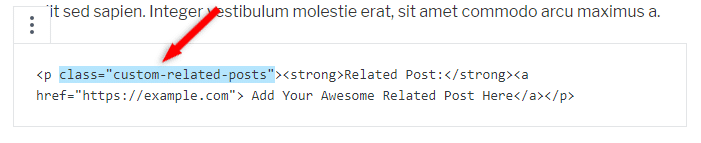
I think this way is easier.
You can apply this method for the Classic Editor as well, as in writing it first in the Visual editor, then switching to the Text editor only to add the class.
You can then switch back to editing the block visually, so it won’t stay as HTML.
What if you want to add more related posts, not just one?!
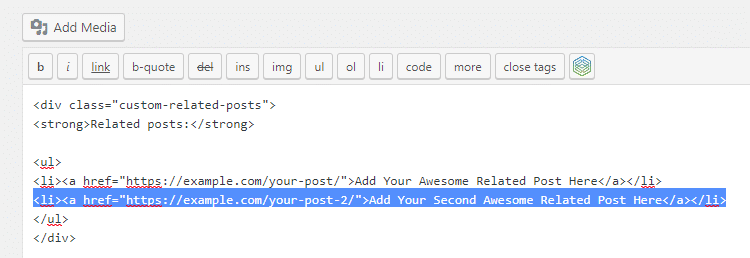
For something like this, we’ll have to change the HTML code a bit.
You’ll have to add everything in a <div> tag with the CSS class in it. I’m also using an HTML list for this, hence the bullet points.
So, use this HTML code as a template:
Of course, change the links and the post titles with your own.
In Gutenberg, it will only work using the Custom HTML block, as you saw above. You can’t use the second, easier method.
With the Classic Editor, you can still use the easier method pointed out above, as in creating the related posts list in the Visual editor and then switching to the Text editor and adding the opening and the closing <div> tags.
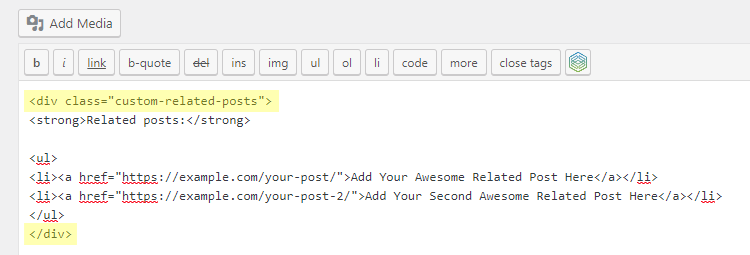
If you want to add more posts to the list, just duplicate a <li> tag by copying and pasting it somewhere between the <ul></ul> tags.
Customizing the Related Posts box
As I mentioned above, I’ll teach you how to change the appearance of the Related Posts box because you might not want it to look like mine.
1. Changing the CSS class
.custom-related-posts is the CSS class in my example. You can change it to (almost) whatever you wish.
For example: .custom-rp, .rp-box, .rpb, and so on.
The easier it is for you to remember it, the better off you’ll be.
Just make sure it’s not something generic because it might be used by your theme or another plugin, therefore creating a conflict.
So, try not to use something like .related-posts.
Remember that the class you use for your CSS code has to be used in the HTML code as well. Don’t add a different one by mistake.
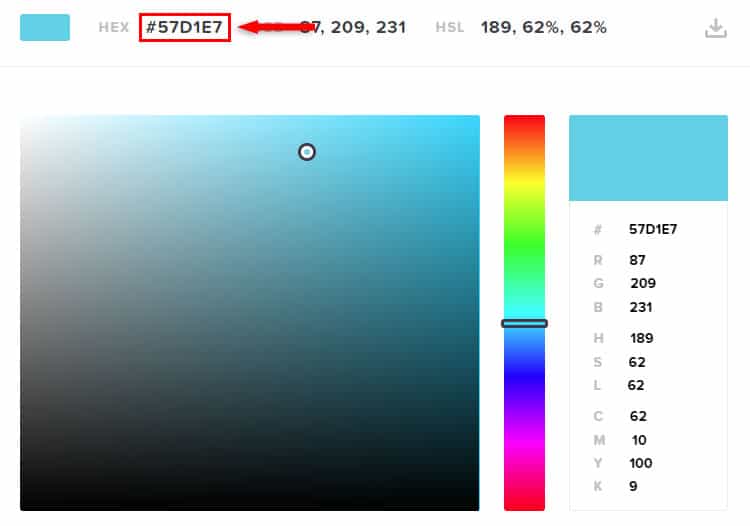
2. Changing the background color
If you want to change the background color, just add another hex code (e.g. #92EAFA).
Use this site to pick a color, generate a hex code and change it in the above CSS code.
3. Changing the border’s positioning, color, thickness, and style
If you want the border placed to the left, then add border-left instead of border-bottom. Right is border-right and top is border-top.
If you want a border everywhere, just add border:, without left, right, top or bottom.
If you want to change the color of the border, then change the hex code as I mentioned above.
If you want to change the border’s thickness, then change 2px with another value (e.g. 4px, 8px, 1px, etc.).
You can also change the border’s style to dotted, dashed, and more.
So, instead of solid, you can add dashed, for example.
Here’s an example of another type of border, so you can understand the changes I’ve mentioned.
border-left: 4px dashed #57D1E7;
4. Changing the padding and the margin
The padding handles the space inside the Related Posts box.
If you want to increase or decrease it, just change the value (e.g. 5px, 15px, 30px, etc.)
The margin handles the space outside the Related Posts box.
If the above or below paragraph is too close to the box, then add a margin.
In my case, the box was too close to the paragraph beneath it, so I added a bottom margin of 20px.
You can remove it, or change its value (e.g. 10px, 25px, etc.), or add margin-top instead of it or in addition to it.
Here’s a different CSS code for the Related Posts box, so you can understand all the changes:
This will make the box look like this in your WordPress posts:
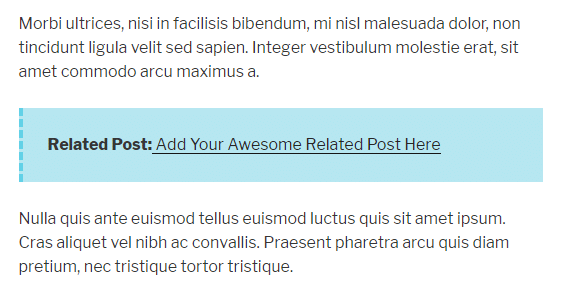
As you can see, the background and border colors are changed.
The border is also dashed and on the left side.
Notes
1. You only have to add the CSS code once in WordPress.
The only thing you need to add every time you want to create a Related Posts feature in WordPress is the CSS class in the HTML code.
2. The changes you make to the CSS code will affect all the Related Posts boxes you added.
For example, in the future, if you want to change the background color of the box to red, all you need to do is go to the CSS code and change the hex color code, and all the boxes from every post will switch to red.
3. To speed things up, I keep the HTML code template in a text file and copy-paste it whenever I need it.
Then, I just change the links and post titles.
I recommend you do the same because it will be annoying to write everything from scratch all the time.
That’s a wrap
I know this method might not be everyone’s cup of tea, but I hope some of you will like it and implement it.
I also hope that I was comprehensive enough, and you managed to add a Related Posts feature in WordPress using this simple CSS method that won’t affect your site’s performance!
Don’t forget to share the post to help out others!
You can quickly subscribe to my newsletter by using this link.
If you have any questions or thoughts, drop a comment or send a message via contact or Facebook page.
You can also hit the follow button on Twitter and subscribe to the YouTube channel.
My WordPress services are at your disposal!

Leave A Comment