Displaying your business hours on your website is very important because that’s how customers can easily check when you’re opening and closing.
In WordPress, this will be easy to do!
All you need is a plugin called Business Hours Indicator, and in this tutorial, I’ll show you how to use it!
Display business hours in WordPress
Step 1 – Install the plugin
Install the plugin in WordPress and go to its settings, which you can find in Settings > Business Hours Indicator.
Step 2 – Adjust the settings
You’ll find five tabs with different settings: General, Hours, Indicator, Table, and Codes.
General

Here, you simply have to set your Time Zone and Time format (12 or 24-hour format).
Hours
First, you’ll have to add a location.
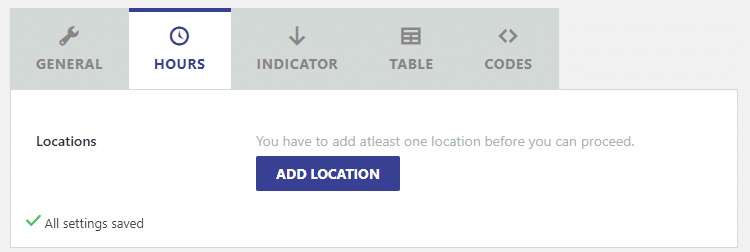
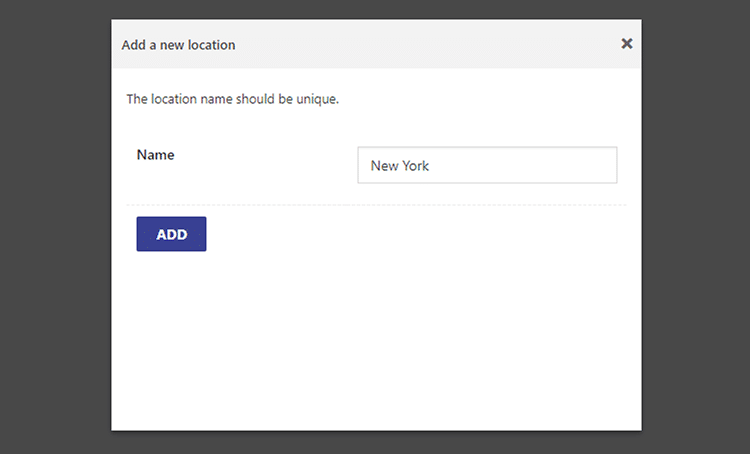
I simply put New York.
After you add your location, three links will appear on the right, which will let you add your normal business hours, holidays schedule, and vacation time.
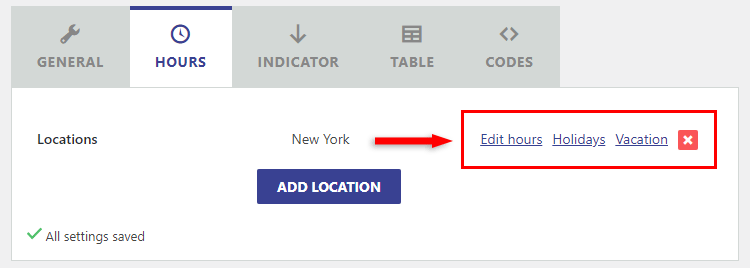
So, you just have to click on the links and set up your hours.
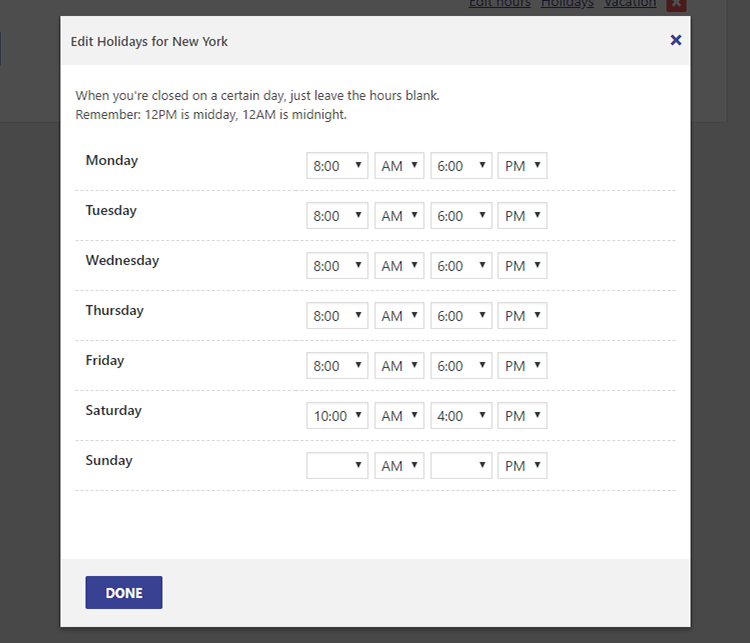
It says there “Edit Holidays for New York”, but those are actually the business hours that I’m editing. It’s just a current bug that shows the wrong title.
Indicator
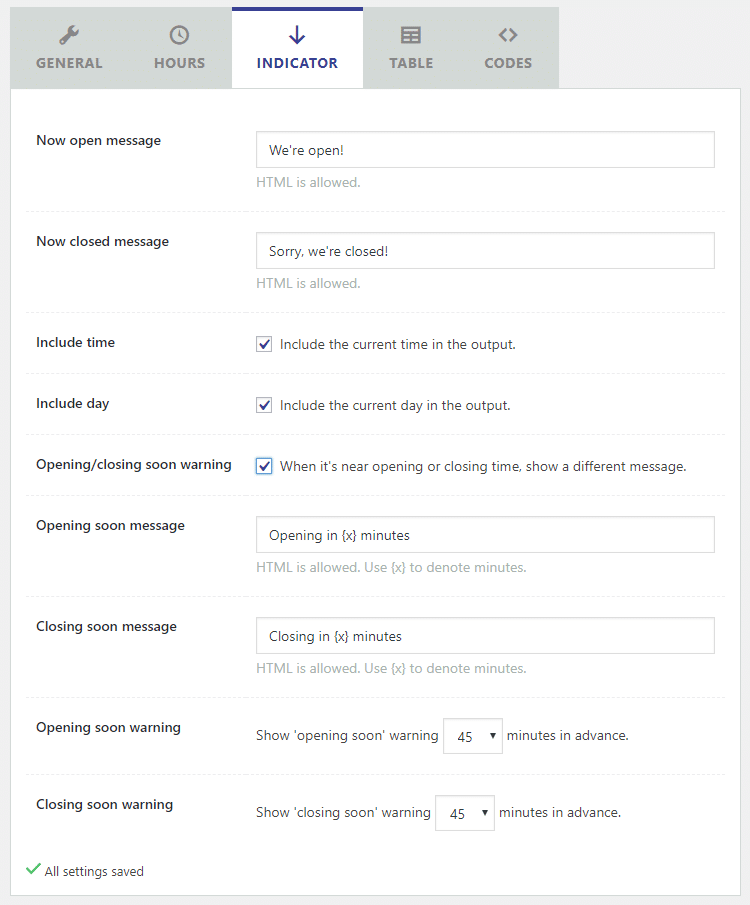
After you finish setting up your business hours, switch tot he Indicator tab, where you have several options, such as displaying your Now open or Now closed messages, including the time and day, and more.
If you check the Opening/closing soon warning box (it isn’t checked by default), several extra options will appear that will allow you to add your messages and set the time.
Table
In the Table settings, you can choose the appearance of your business hours table and if you want to include the holidays and vacation hours.
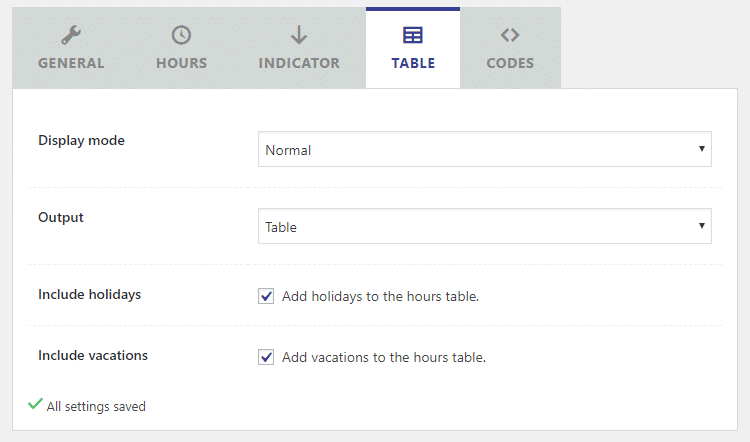
You have two Display mode options: Normal or Consolidated.
The plugin comes with a built-in preview feature, so you can see how it will look like.
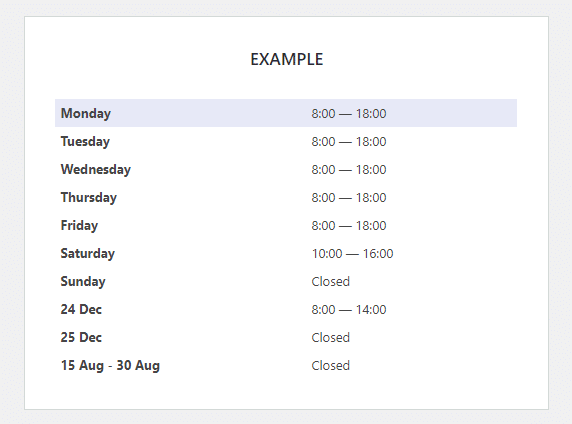
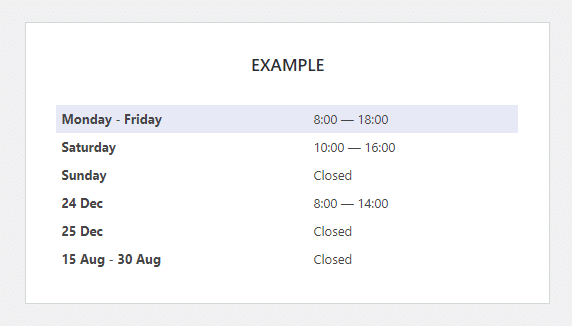
You also have two Output options: Table or Inline.
The Table output displays as you see in the above examples.
The Inline output displays like this:

Of course, I’ll also show you how it will look like in the front-end as soon as I finish with the settings and setup.
Codes
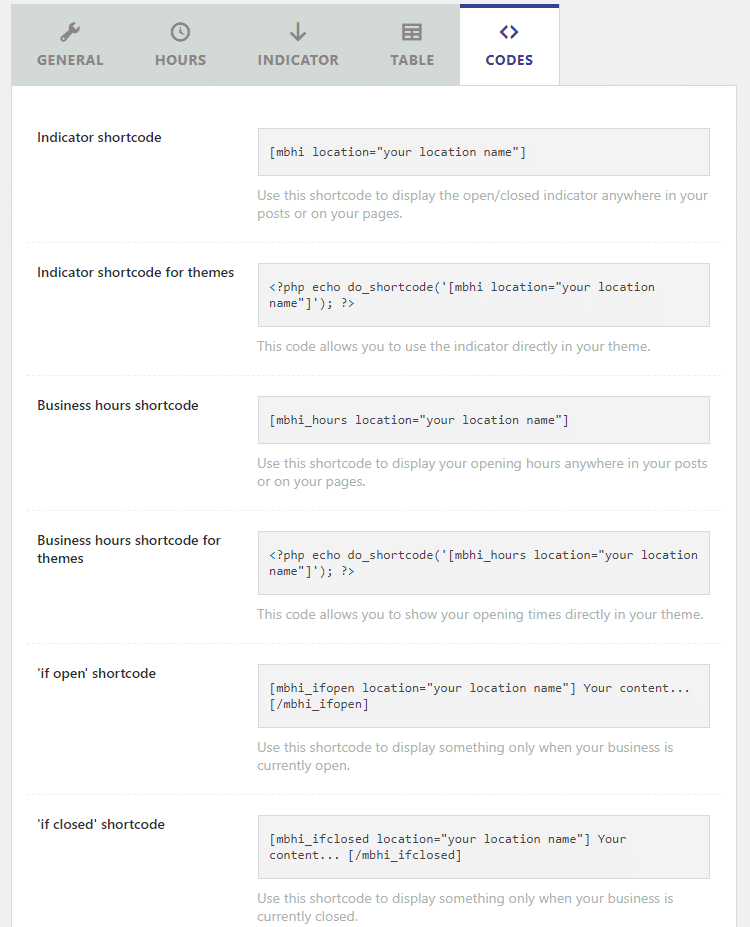
Here, you’ll get the codes necessary to display the business hours in the front-end.
In most cases, you’d want to use the non-PHP shortcodes (the ones with the square brackets […]) because it’s simpler.
Step 3 a) – Paste the shortcode where you want to display your business hours
Now, to display your business hours in your WordPress website, on the front-end, just copy the Business hours shortcode:
[mbhi_hours location="your location name"]
Then, paste it on a page where you want the business hours to appear.
Here’s more on how to add shortcodes in WordPress.
Don’t forget to add the name of your location (see Step 2 > Hours) instead of your location name.
In my case, the shortcode will be:
[mbhi_hours location="New York"]
If you also want to display the open/closed indicator (We’re open/We’re closed), then use the Indicator shortcode as well:
[mbhi location="your location name"]
Again, don’t forget to add your location.
You can “play” around with the shortcodes in several other ways to display different information.
Here’s a complete list of shortcodes from the plugin developer.
Here’s how it will look like on the front-end:
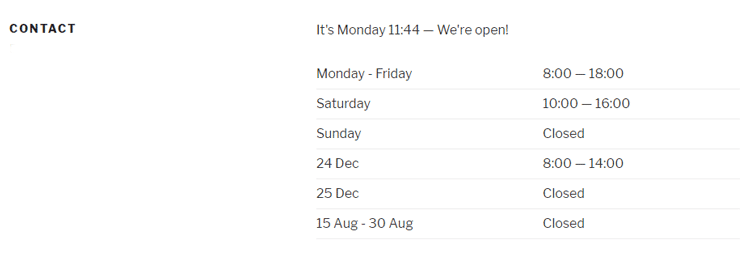
This is on the default Twenty Seventeen theme.
On your WordPress theme, it might look different.
Step 3 b) – Display the business hours in a WordPress widget
The plugin also comes with built-in widgets.
So, if you want to add your business hours in your sidebar or footer, you can go to Appearance > Widgets and use one of the widgets.
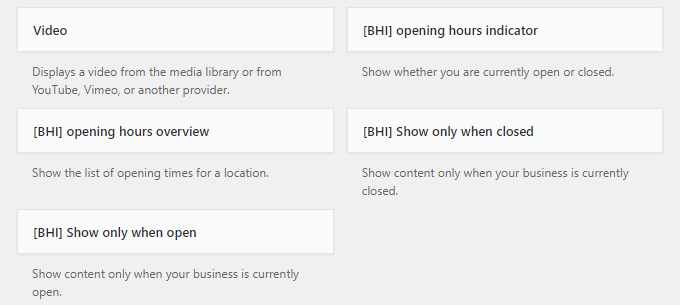
The widgets are marked with [BHI].
For example, here’s how the [BHI] opening hours overview widget looks like on the default Twenty Seventeen theme.
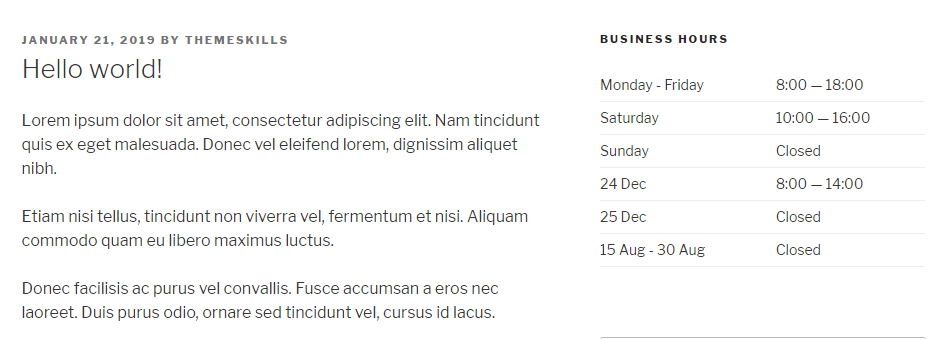
Pretty neat, huh?
Go Pro or donate to the developer
The plugin also has a Pro version with many other features that you might need, such as:
- Caching support;
- SEO features;
- WooCommerce support;
- Message builder to add custom messages;
- Premium support;
- and more.
You can also consider donating to the developer by going to the plugin’s WordPress page and use the Donate to this plugin button found at the bottom of the right sidebar.
That’s a wrap
Hope you found this tutorial useful and comprehensive, and you managed to add your business hours in WordPress using this simple and awesome plugin!
Don’t forget to share the post to help out others!
You can quickly subscribe to my newsletter by using this link.
If you have any questions or thoughts, drop a comment or send a message via contact or Facebook page.
You can also hit the follow button on Twitter and subscribe to the YouTube channel.
My WordPress services are at your disposal!


Leave A Comment