In this tutorial, I’ll show you how to change the WordPress logo in your login page, along with its URL and hover title.
The changes will apply to the registration page as well!
Fortunately, we don’t need a plugin for this because it’s quite easy to do via coding, and I’ll guide you step by step.
The fewer plugins you have, the better! Always keep that in mind.
So, let’s get right to it!
Accessing Your WordPress Files
You’ll have to access your site’s files to create a folder, add an image, then add a bit of code in your functions.php file.
I’ve written this tutorial about how to access your WordPress site’s files using 3 different methods. So, read that first if you don’t know how to do it.
I’m going to use cPanel and a child theme for my example. The UI (User Interface) for the cPanel might differ from hosting to hosting, but not by much.
Backup, child theme, and child theme alternative
I recommend creating a site backup before doing this, just to be safe.
I also recommend having a child theme in place, otherwise, the changes will be gone with the next theme update.
If you don’t have a child theme, create the images folder in the parent theme’s folder, then, use this plugin to add the PHP code.
Changing the Login WordPress Logo
Step 1
Log in to your cPanel and create an images folder (if you don’t have one already) in your child theme’s folder.
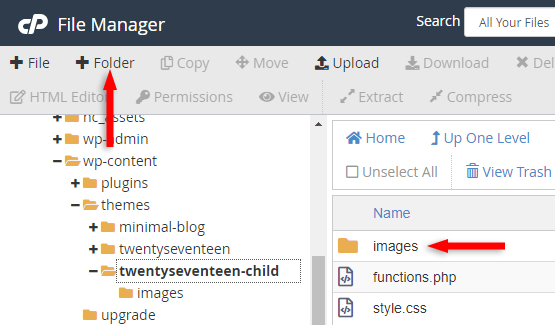
Your child theme’s standard path should be:
public_html/wp-content/themes/YourThemeName-child
Step 2
Go into the images folder and upload your logo file.
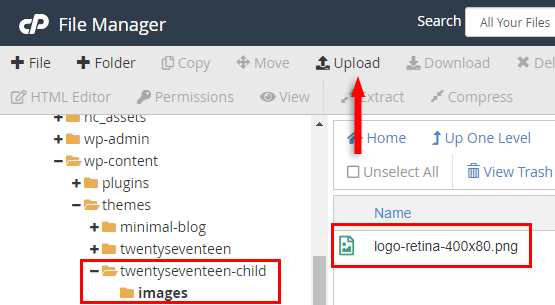
Note down the name of your logo file (e.g. example.png) because you’ll have to add it in the code.
Step 3
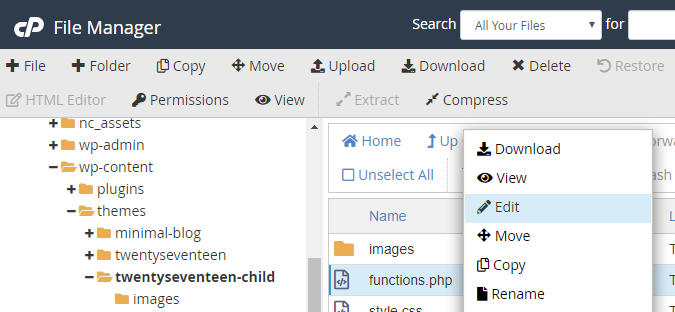
Go back to your child theme’s folder, right-click one the functions.php file and edit it.
Step 4
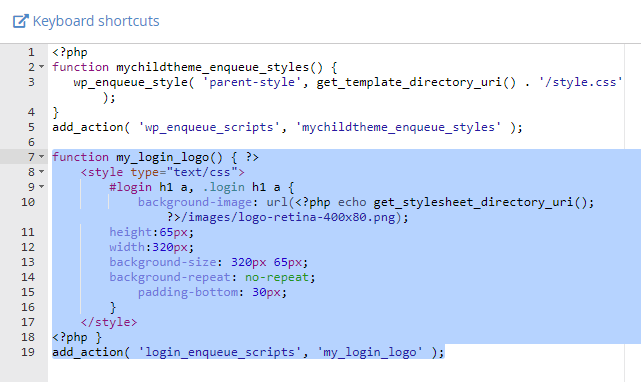
Add the following code right at the bottom of the file or right above the ?> ending tag if it has one.
Step 5
Change the logo file name from my code with your own, here:
/images/logo-retina-400x80.pngSo, for example, if your logo file is named my-logo.png, then add that file name instead of logo-retina-400x80.png from the above code.
You can also add other values for the height, width, and padding if you want to.
Final step
Check your WordPress login page and see if the logo has been changed.

If it hasn’t, clear your site and browser (or use a Private/Incognito window) cache and try again.
Changing the Login Logo URL and Title
By default, the login logo’s link will point to https://wordpress.org, and the title – when you hover over it – will be “Powered by WordPress”.
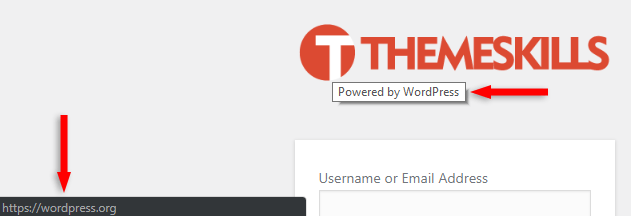
Now, that’s not very nice if you want to add your own brand there, right?
So, here’s what you need to do:
Step 1
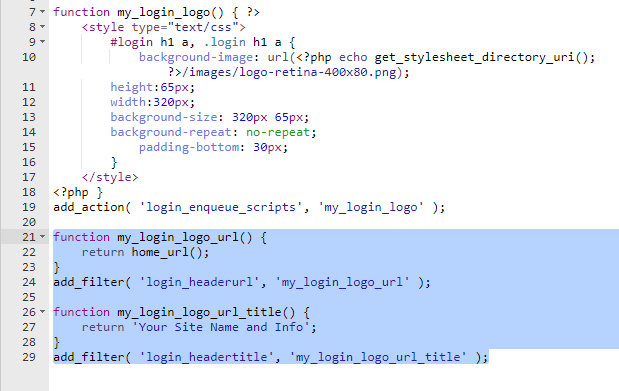
Go to your functions.php again and add the following code right below the previous one.
Step 2
Where it says Your Site Name and Info, you can add whatever text you wish.
That will appear as the logo’s title when someone will hover over it.
Only replace the text, don’t delete the single quotes or anything.
You don’t have to add a URL to the code because it will point automatically to your homepage.
Final step
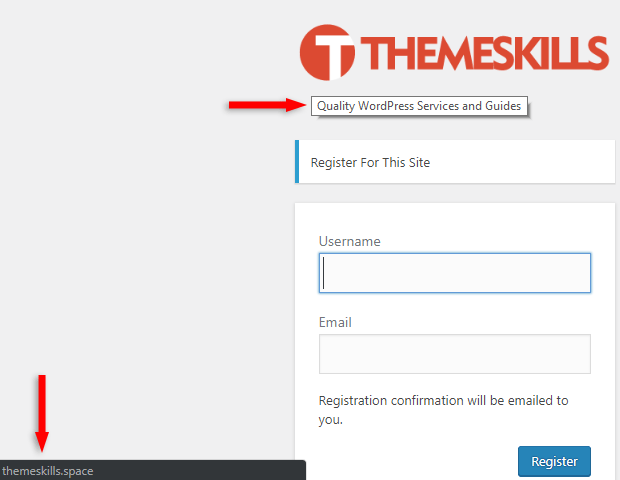
Check to see if the logo’s URL and title have changed in the WordPress login page.

If the changes don’t take place, clear your site and browser (or use a Private/Incognito window) cache and try again.
Also, as I mentioned at the beginning of the tutorial, the changes will automatically apply to the WordPress register page as well!
That’s a Wrap
I hope the tutorial was detailed enough, and you managed to change the WordPress logo, its URL, and title in your login page!
If you have any questions or thoughts, drop a comment or send a message via contact or Facebook page.
You can also hit the follow button on Twitter and subscribe to the YouTube channel.
Don’t forget to share the post to help out others!


Leave A Comment