It’s needless to say how important a navigation menu is.
Having a menu helps you structure your website, allowing users to easily navigate through it. It also makes it easier for the search engines’ crawlers to discover your site’s content, which will improve your SEO.
In this article, I’ll show how to create, add, and customize a navigation menu for your WordPress website!
We’ve made a video tutorial for you as well, but the post contains a bit more info, especially when it comes to menu customization, so you should check that out too.
Creating a WordPress menu
Make sure that you’ve created the pages that you want to add in your menu. Then you can proceed with creating the WordPress navigation menu.
1. Go to Appearance -> Menus, on the left side of the Dashboard.
2. Enter your menu name in the Menu Name field and click the Create Menu button.
I named it “Header Menu” because this will be the menu that will appear in my theme’s header, at the top of the website.
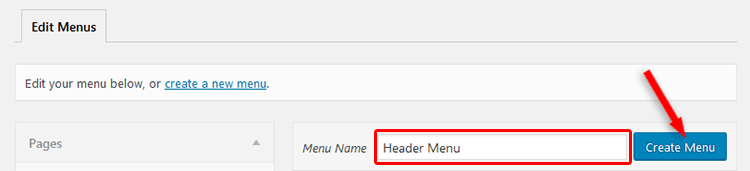
The create a new menu link, that you see in the above image, should be used when you already have a menu created, but want to add a different one from scratch.
After the menu has been created, let’s add items to it.
Adding items to the WordPress menu
1. Choose the items that you want to add
For this example, I’ll only work with pages, but you can also add Posts, Categories, and Custom Links in the same way.
Check the pages that you want to add to the menu, then press the Add to Menu button.
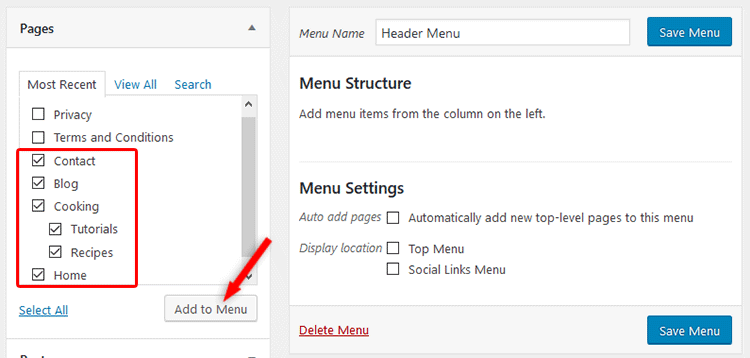
As you can see, I left out the “Terms and Conditions” and “Privacy” pages, because I don’t want them in the header menu.
Since I had fewer pages to uncheck than to check, I just pressed Select All and then unchecked the two pages. It speeds things up.
2. Reorder the menu structure and create child items (sub-menu items)
Here’s how the menu structure will look like after adding the items:
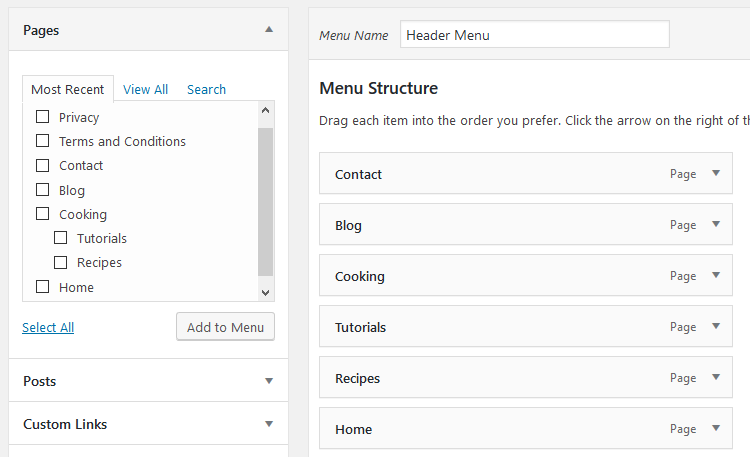
The order that you see in the menu structure will also appear on your website.
So “Contact” will be the first menu item, “Home” the last, and so on, and it’s not a good order.
“Home” (your homepage) should be the first item, then the rest of the pages depending on importance. “Contact” should usually be the last.
For my example, I’ll add them like this: Home · Blog · Cooking > Recipes > Tutorials · Contact.
I’ll also correct something in the menu. “Recipes” and “Tutorials” are the child pages of the parent page, which is “Cooking”, so I want to make them child menu items, or sub-menu items, however, you wish to call them.
To reorder the menu items, just click, hold, and drag up or down.
To make a child item menu from a parent one, just click, hold, and drag to the right.
Adding the WordPress menu on your website
Now you have to display the menu on your website.
The place where you can add a menu depends on your theme.
For my example, I’m using the default Twenty Seventeen theme, which only allows me to add the menu at the top (Top Menu).
So I’ll set my Display Location to Top Menu.
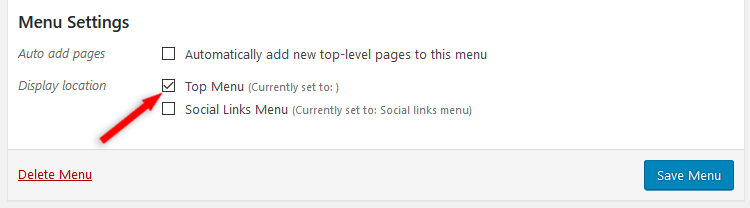
I don’t recommend checking “Automatically add new top-level pages to this menu”. It’s best to manually add any pages that you want, especially if they have long titles and you need to rename the navigation label, as you’ll see below.
After you’ve added the pages to the menu, chosen the structure that you want, and chosen the display location, you can finally save your menu by pressing the Save Menu button!
Let’s see how it looks like on my end:
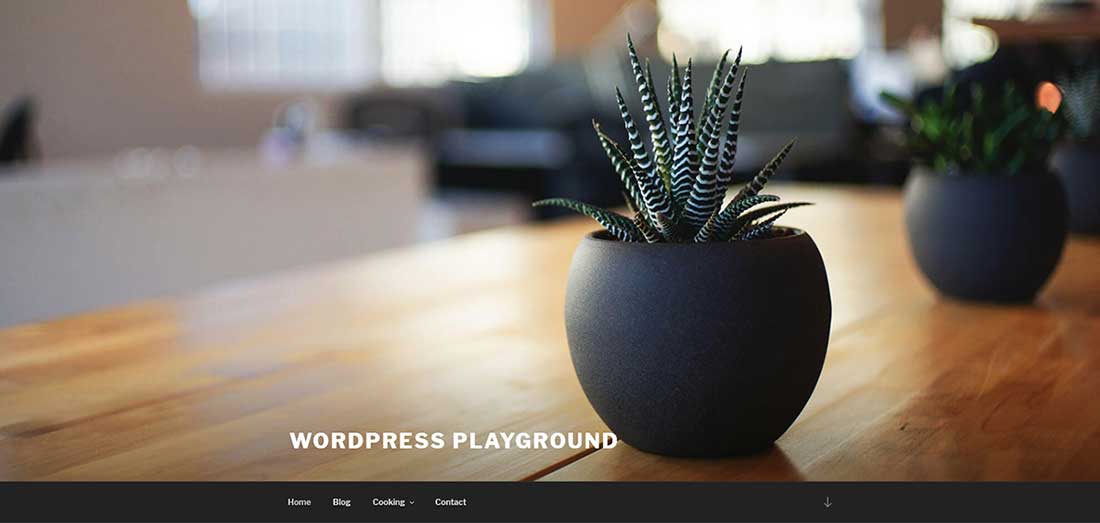
Click to enlarge
The menu is not exactly at the top, but that’s the layout of the Twenty Seventeen theme.
Also, notice “Cooking’s” child menu items (sub-menu items).

Customizing the WordPress menu
Changing the label of the menu items
Usually, you’d want to add descriptive titles to your pages, but those long titles appear in the menu when you add the pages, so you’ll have to shorten the label of them menu items.
Don’t worry, it won’t change the page title as well.
Let’s say you have a page called “Hire the Best Cooks in Staten Island, New York”, and you add it to the menu.
This is how it would look like in the back-end:
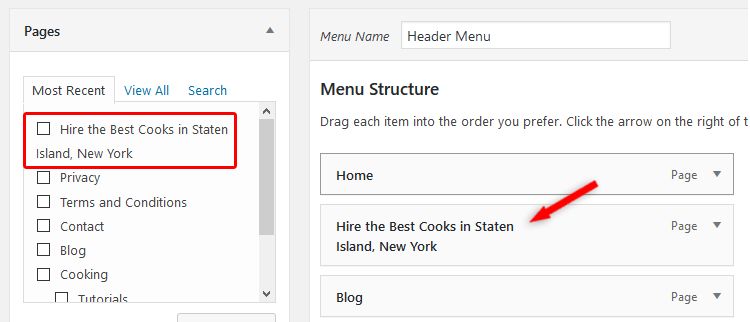
And, of course, it will display like that in the front-end as well:

Doesn’t look good, right? Right!
The menu items will also start displaying on two rows if you’ll add other items and run out of space.
To rename a menu item, just click on the black drop-down arrow, and in the Navigation Label, add the label that you want.
In my case, I’ll choose something nice and short, like “Hire Us”.
Don’t forget to save the menu for the change to take place.
Opening menu items in new tabs
I’ve written a post on how to make WordPress menu items open in a new browser tab. You might want to check it out.
Additional customization
You can enable additional customization features by clicking the Screen Options drop-down, found in the upper-right side.

There you’ll see some Advanced menu properties, which you can enable in order to further customize your menu.
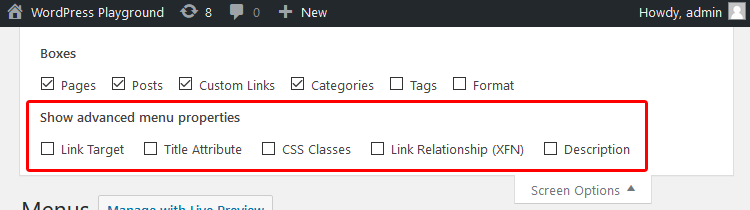
- Title Attribute – The title will appear when the users will hover their mouse cursor over the menu item;
- CSS Classes – You can add a CSS class, and then, with some additional CSS coding, you can customize the menu item by changing its color, font, and so on;
- Link Relationship (XFN) – It’s a bit more to explain here, so it’s best if you’d read this article;
- Description – If your theme supports this, the description will appear in the menu, usually under the menu item.
That’s a wrap
Hope you found the post useful and comprehensive!
Don’t forget to share it with your friends!
If you have thoughts, questions, or need help with something, just drop a comment, contact us, or message us on Facebook.
You can also subscribe to our YouTube channel and follow us on Twitter.
If you want to start your own WordPress blog, or need a website for your business, our WordPress installation service is at your disposal!

Very helpful, thanks!
I’ve used your advice on how to create dropdowns (sub-pages in menu) to give each novel I’ve published its own page under the heading of Works on my website.