
This post was last updated on 6/13/2019
If you care about SEO – and you should, at least for the on-page part – then submitting your WordPress site to Google Search Console (formerly known as Google Webmaster Tools) is a must!
It provides a lot of valuable information and statistics about your website.
So, in this tutorial, I’ll show you how to add your WordPress website to a new or existing Search Console account, as well as how to speed up the crawling and indexing process.
How to Submit your WordPress Site to a New Google Search Console Account
You’ll need a Google account for this, and I assume you already have one.
If you’re among the few that don’t have one, then create one before continuing with the below steps.
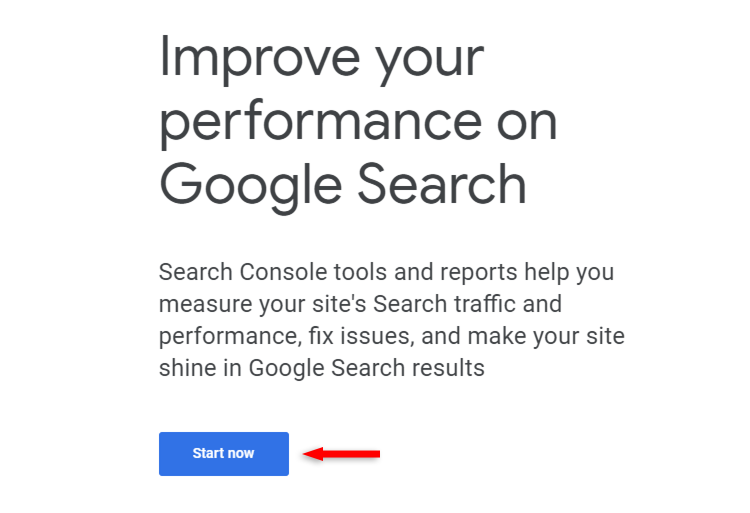
Step 1 – Start the process
Go to Google Search Console and click the Start now button.
Step 2 – Select property type
You have two property types to choose from: Domain or URL prefix.
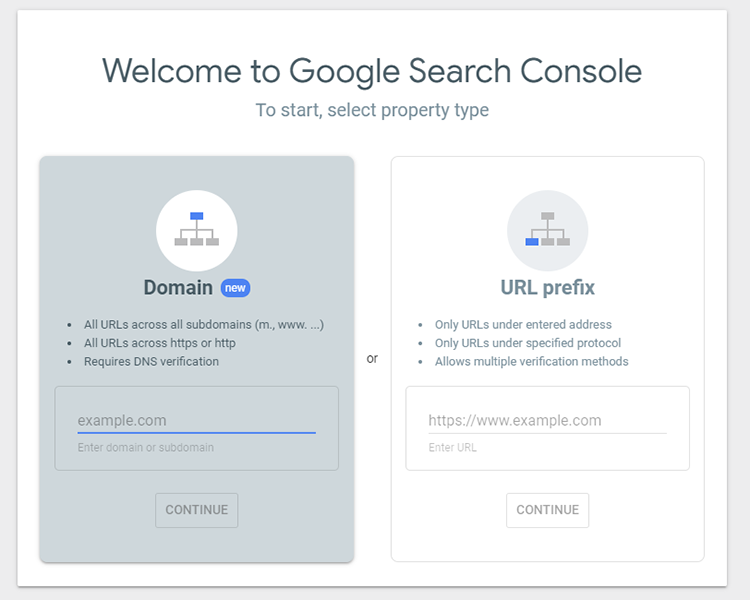
In most cases, you’d want to go with the Domain property type, which will include all of your website’s versions and subdomains, as it’s specified by Google there.
Choosing the “Domain” property type
Simply enter your domain, without anything else (i.e. http://), and click Continue.
Then, you’ll see this:
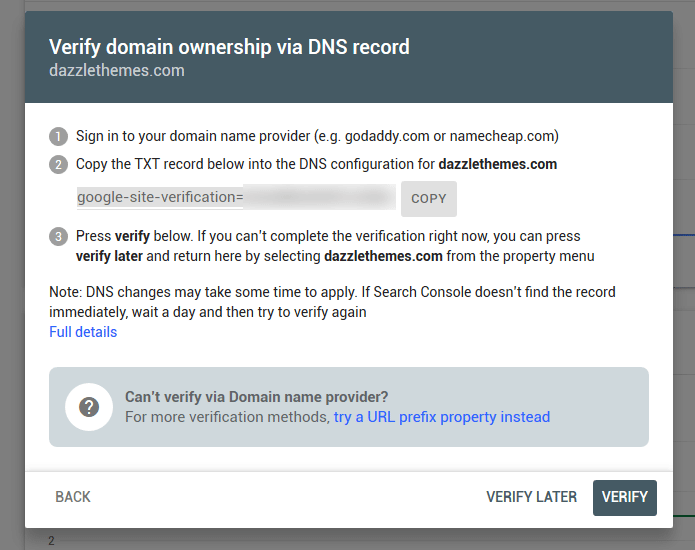
You’ll have to verify the ownership of that domain via DNS record.
This means that you have to create a TXT record and paste the verification code displayed there.
I can’t show you exactly how to do that since it differs from domain registrar to domain registrar.
I recommend either checking their knowledge base or contacting them for help.
If you’re using Cloudflare, your DNS is pointed to them, so you’ll have to create the TXT record in Cloudflare.
After adding the TXT record to the DNS, you need to go back and click the Verify button.
But, depending on your registrar, the DNS changes might take a minute or a day. If you’re using Cloudflare, it shouldn’t take more than a minute.
Choosing the “URL prefix” property type
This property type is useful if you don’t want to submit your main domain and everything related to it, such as subdomains.
This type also offers multiple ownership verification methods. Also, the verification will be instant since it doesn’t depend on DNS.
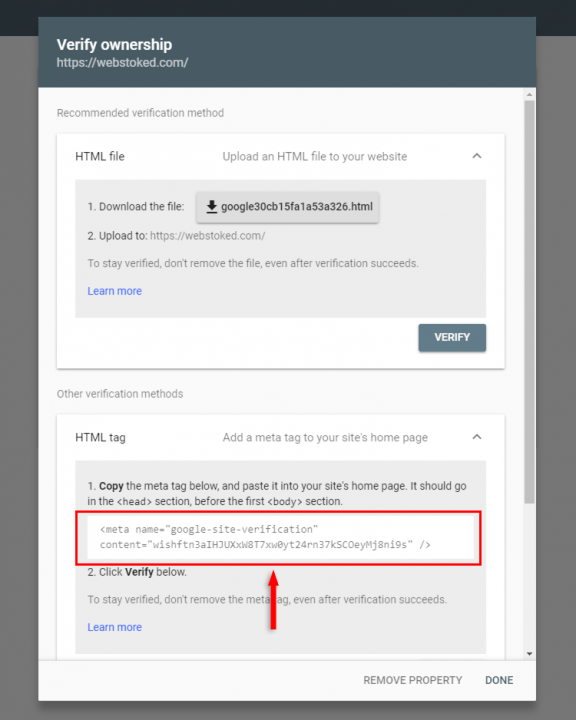
Personally, I use and prefer the first method, the one where you have to download and upload an HTML file.
But for that, you’ll have to access your FTP, and it can be a bit complicated if you’re a complete beginner.
So, I’ll show you an easier way where you have to copy the meta tag (see above image) and add it to your WordPress website.
There are 3 easy ways to do that, and you most likely already use one of them.
So, use one of these ways to add the meta tag verification code, then go back to the Search Console website and click the Verify button.
First way
Check your theme’s settings and see if it allows you to add code inside the <head></head> section of your website.

This is how it looks like in the Avada theme (affiliate link).
If you’re using it, then you can find that in Avada > Theme Options > Advanced > Code Fields.
Second way
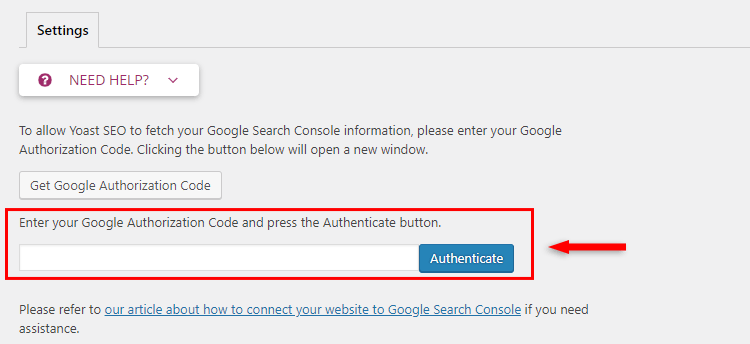
If you’re using the Yoast SEO plugin – and you should because it’s an essential WordPress plugin – then go to SEO (from your Dashboard) > Search Console.
There, you can paste the whole meta tag and click Authenticate.
Third way
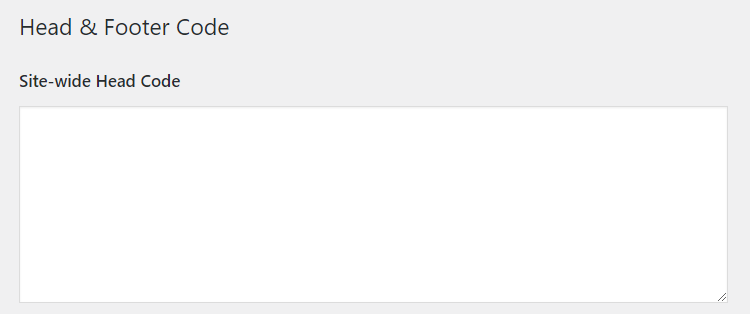
If you don’t already have a plugin for situations like this, then you can use AddFunc Head & Footer Code.
Here are 3 different ways to install a WordPress plugin.
Go to Settings > Head & Footer Code and paste the meta tag in Site-wide Head Code.
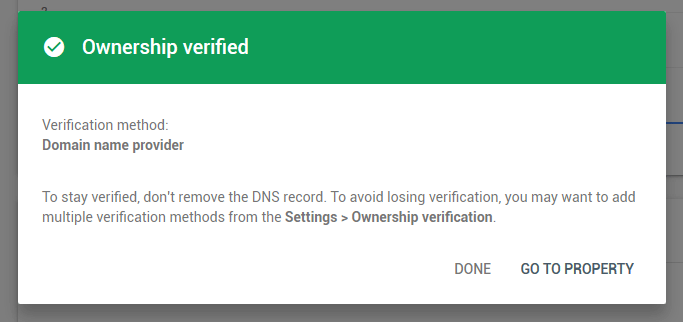
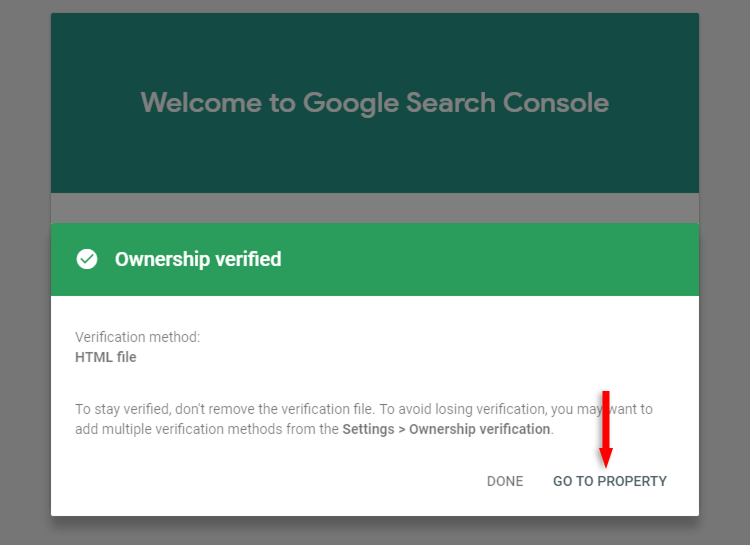
If the verification succeeded, an Ownership verified pop-up will appear.
Step 3 – Add your sitemap
After the verification succeeded, click on the Go to Property button.
Once you’re finally in Google Search Console, go to Sitemaps to submit your WordPress website’s sitemap.

If you’re using the Yoast SEO plugin, your sitemap’s URL will be https://yourdomain.com/sitemap_index.xml, but you’ll only need the slug for the sitemap, not the whole URL. Search Console will automatically add your domain.
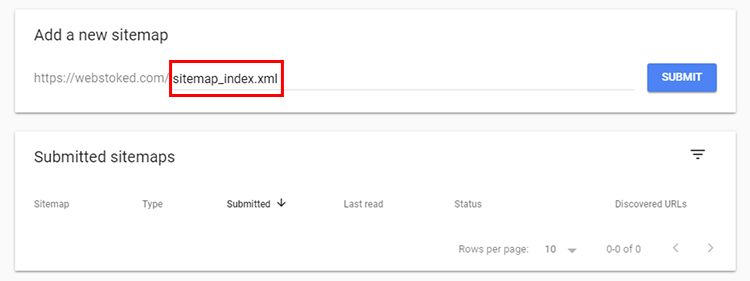
If you’re using other plugins that generate a sitemap, then find out what’s the URL and add that.
Click the Submit button.
It might take a while until Google processes it.
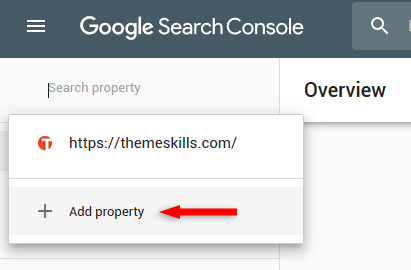
How to Add Your WordPress Site to an Existing Google Search Console Account
The whole process is the same as the one shown in the first section of this guide, except that you need to add the property from inside Search Console.
- Sign in to your Search Console account;
- Click the down-arrow on the top-left, next to your current property;
- Click Add property.
How to Speed Up the Crawling and Indexing of Your WordPress Site
Normally, Google takes its time with crawling and indexing new websites.
So, if your WordPress website is new, and you want it to be crawled and indexed faster, then you should “poke” Google and let it know about it.
Here’s how to do that.
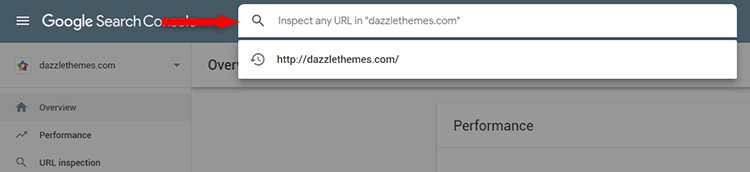
Step 1
Enter your domain at the top, in the URL inspection field.
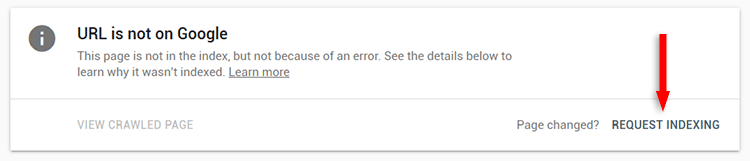
Step 2
It won’t show any data because you just submitted the WordPress website to Google Search Console.
Click on Request Indexing.
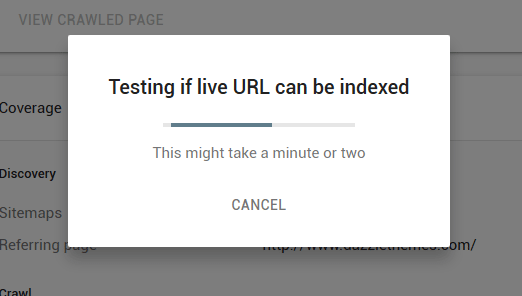
Step 3
Wait a bit.
Step 4
A notification appears, letting you know that the URL was added to a priority crawl queue.
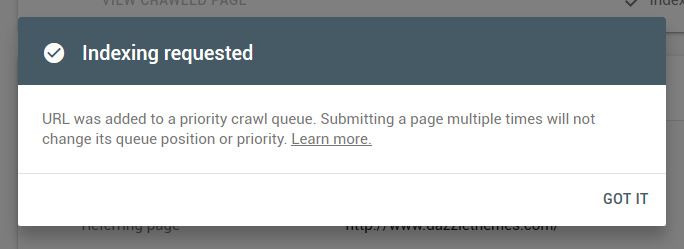
Now, your WordPress website should be indexed a lot faster.
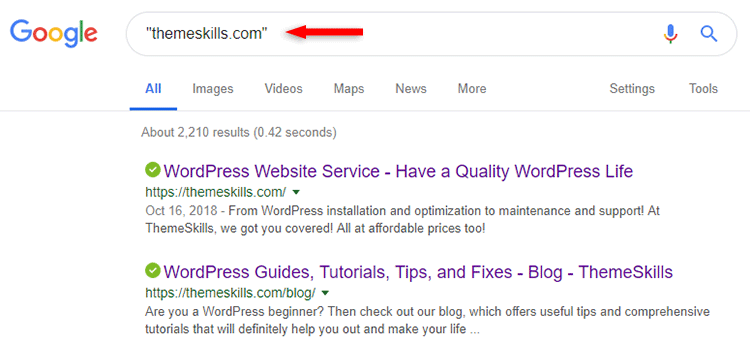
To check if and how much of your WordPress website is indexed, perform a search on Google with site:example.com or "example.com" (quotes included).
Of course, change example.com with your actual domain.
Here’s an example, using my website.
That’s a wrap
I hope you found this tutorial comprehensive and managed to successfully submit your WordPress site to Google Search Console!
Don’t forget to share the post to help out others!
If you have any questions or thoughts, drop a comment or send a message via contact or Facebook page.

Leave A Comment