I just launched another blog several days ago, called WebStoked.com, and it’s using the GeneratePress WordPress theme (affiliate link), which I’m very happy with!
When I wanted to add some social media icons to the main menu for the blog’s Twitter and Facebook pages, I realized that there are none.
That’s no surprise, though, because while GeneratePress has plenty of customization options, it’s not one of those WordPress themes packed with features.
It’s a theme which focuses a lot on performance, and that’s what I like about it.
Luckily, there are several ways to add social media icons to the GeneratePress theme’s main menu.
But, in this tutorial, I’ll only focus on the one that doesn’t require a plugin.
If there’s something that you can do without a plugin, then you should definitely do that.
The fewer plugins you have, the better!
Let’s get to it!
Add Font Awesome social media icons to GeneratePress menu
For the icons, I’ll use Font Awesome, which is the go-to toolkit for almost everyone, especially web developers.
Here’s what you need to do.
Step 1
I recommend backing up the file or the whole website, and also have a child theme in place, otherwise, the changes will be lost with the next update.
You can download the child theme for GeneratePress here.
You need to access your WordPress site’s files in order to edit the functions.php file.
It’s normally found in:
public_html/wp-content/themes/generatepress_child/functions.php
Or, if you’re doing this for an add-on domain, not your main one, then the file should normally be in:
public_html/YOURDOMAIN/wp-content/themes/generatepress_child/functions.php

An alternative to this method is to use a plugin called Code Snippets. But, as I said, it’s better to use as few plugins as possible.
Step 2
Add this code at the very bottom of the functions.php file.

At the time I’m writing this, the latest Font Awesome version is 5.6.1.
If you need to update the Font Awesome version in the future
Later on, when they’ll update to a higher version (e.g. 6, 7, etc.), you just need to go here and copy the code as it’s highlighted in the below image.
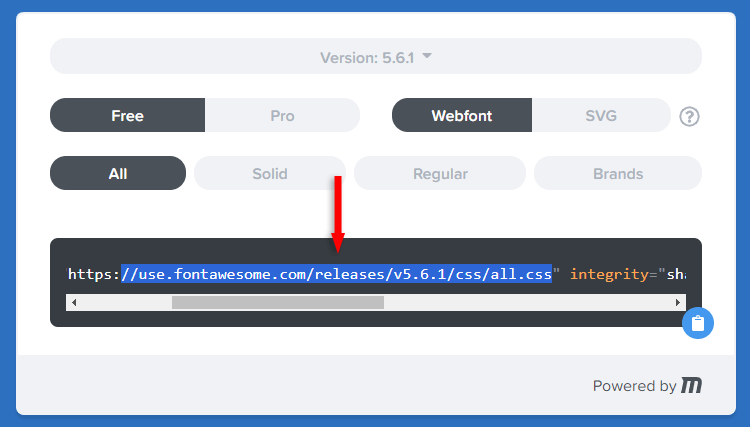
Then, you just paste that link and replace it in the PHP code between the apostrophe marks (' ').
Also, replace the version between the apostrophes where it says '5.6.1' now.
Let’s take an example to understand better.
Let’s say they’ll launch version 7.0.2 in the future, and you want to update the code.
After you copy and replace the link and the version, your code should look like this:
Step 3
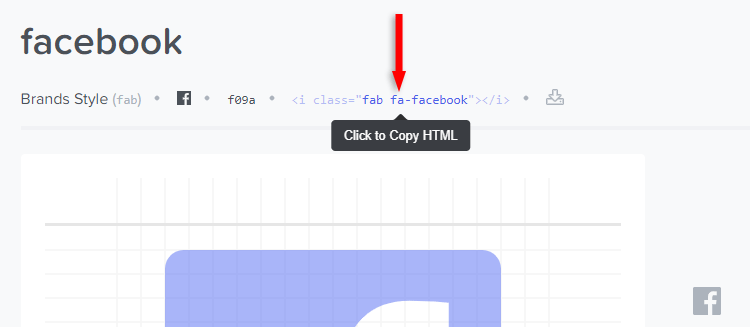
Go to Font Awesome, search and select a social media icon that you want.
Then, click on the HTML <i> tag to copy it.
Step 4
Access your menu in your WordPress Dashboard > Appearance > Menu.
Step 5
Click on Screen Options at the top-right, then enable Link Target and CSS Classes.

Step 6
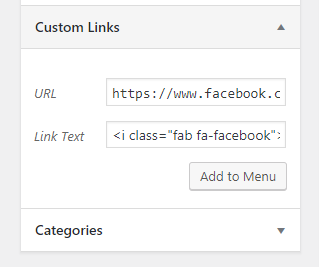
Create a Custom Link.
In the URL field, add your social media link (Facebook, in my example), and in the Link Text, add the Font Awesome HTML icon code that you copied.
Click Add to Menu.
Step 7
Once the custom link was added to the GeneratePress menu, click the down-arrow to display the settings.
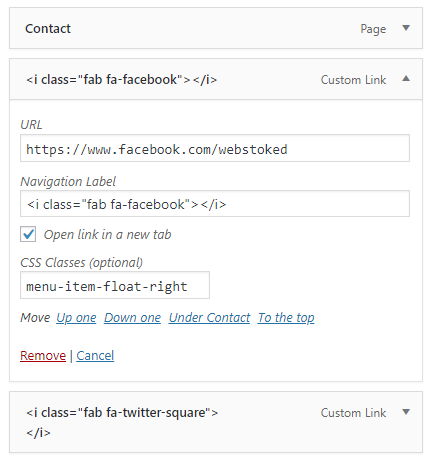
Add the following class in the CSS Classes field to set the social media icons to the right part of the menu.
menu-item-float-right
Since this is an external link, you should make the menu item open in a new tab, so the visitors won’t completely leave your site after clicking on the icons.
Therefore, I recommend checking the Open link in a new tab box.
That’s it!
Now, your social media icons should be added to the GeneratePress menu, and they should look something like this:
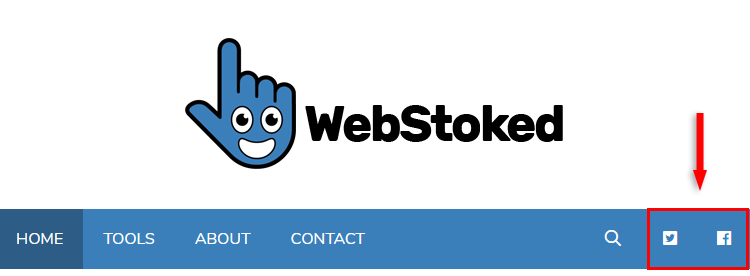
They automatically integrated nicely with the design. I didn’t have to add any CSS customization.
You can follow the same example to add more icons.
That’s a wrap
I hope the tutorial was comprehensive and you managed to add social media icons to the menu of your GeneratePress theme!
Don’t forget to share the post to help out others!
You can quickly subscribe to my newsletter by using this link.
If you have any questions or thoughts, drop a comment or send a message via contact or Facebook page.
You can also hit the follow button on Twitter and subscribe to the YouTube channel.
My WordPress services are at your disposal!

After scouring the internet looking for a way to get rid of an extra plugin – Font Awesome 4 Menus – this awesome write up showed the way. My website went from loading two versions of FA to one, and google page speed insights is up a bit. THANKS!
That’s awesome! I’m happy that my tutorial helped you!