
Elementor has a lot of great widgets, pre-made blocks, and pre-made templates in its free version. If you want more, you can buy their Pro package.
If you want even more, then you can buy the JetElements add-on, which currently offers over 40 widgets for Elementor, as well as pre-made blocks and homepage templates.
If you want to find more about it before making a decision, then read this JetElements review.
You can use this coupon code THEMESKILLS10 to get a 10% discount!
How to Install and Set Up JetElements
Since JetElements is a premium Elementor add-on, it’s not found in the WordPress repository.
Therefore, you need to install it by simply uploading the file from your WordPress dashboard.
Don’t worry, it’s easy! Here’s how to upload and install a WordPress plugin.
After you install and activate it, you’ll most likely need to update your database for JetElements.

Do that, then go through its settings found in Elementor > JetElements Settings.
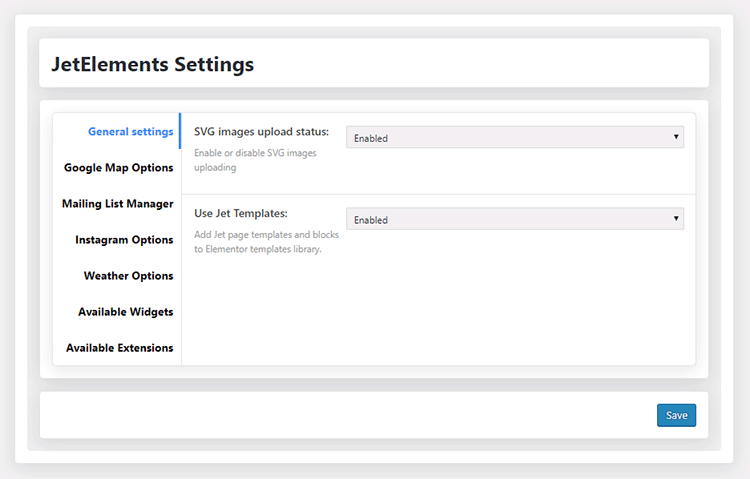
The, you have:
- General Settings – if you want to enable SVG upload in WordPress and enable/disable Jet templates and blocks (more on that further on the review);
- Google Map Options – if you’re using Google Maps;
- Mailing List Manager – if you’re going to use the Subscription Form widget. It only supports MailChimp;
- Instagram Options – if you’re going to use the Instagram widget;
- Weather Options – for the Weather widget;
- Available Widgets – here, you can enable or disable widgets. I assume you won’t use all of them, so I recommend disabling the ones that you won’t use;
- Available Extensions – here, you can enable or disable extensions. Currently, only the Section Parallax extension is available.
What Does JetElements Offer?
1. Extra widgets
JetElements offers a variety of different widgets for the Elementor WordPress page builder.
The developers frequently add more widgets, so expect new goodies all the time.
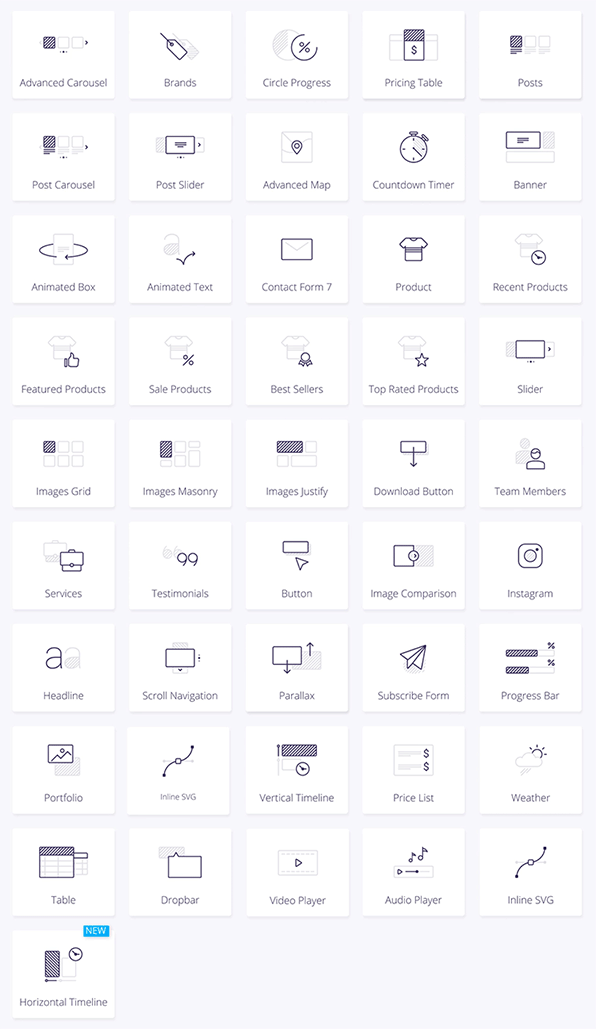
Here are the current Elementor widgets that are offered:
- Advanced Carousel;
- Advanced Map;
- Animated Box;
- Animated Text;
- Banner;
- Brands;
- Button;
- Circle Progress;
- Countdown Timer;
- Headline;
- Download Button;
- Image Comparison;
- Instagram;
- Images Layout;
- Parallax;
- Pie Chart;
- Portfolio;
- Posts;
- Posts Carousel;
- Posts Slider;
- Progress Bar;
- Pricing Table;
- Scroll Navigation;
- Services;
- Slider;
- Subscribe Form;
- Team Member;
- Testimonials;
- WooCommerce Recent Products;
- WooCommerce Featured Products;
- WooCommerce Sale Products;
- WooCommerce Bestsellers;
- WooCommerce Top Rated Products;
- WooCommerce Product;
- Contact Form 7;
- Inline SVG;
- Price List;
- Vertical Timeline;
- Table;
- Weather;
- Audio Player;
- Dropbar;
- Video;
- Horizontal Timeline.
How to use the extra widgets
Using the extra widgets provided by the JetElements add-on is exactly the same as using Elementor’s own widgets.
Edit a page with Elementor, then scroll all the way down after the Basic, General, and WordPress widgets.
There, you’ll find the JetElements widgets.
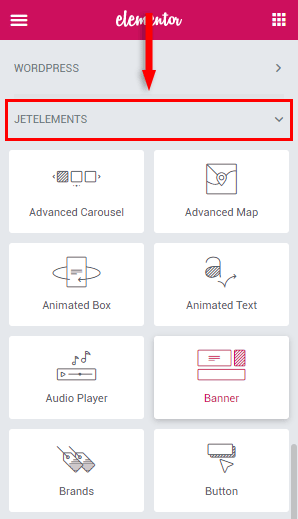
Now, all you need to do is drag-and-drop them into your page and adjust their options based on your needs.
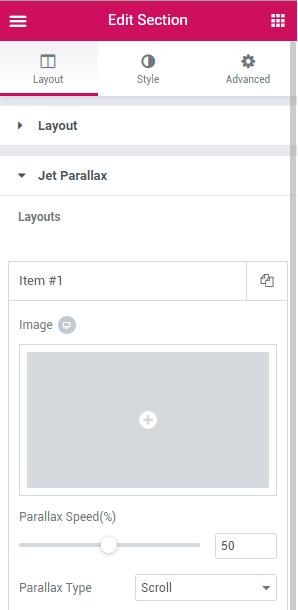
The Parallax section extension won’t be found as a widget there. You’ll find it by adding an Elementor section and accessing its settings.
2. Pre-made homepage templates
JetElements also offers some great homepage templates that are already built! You just need to insert them.
Here’s how to do that.
Step 1
Edit a page with Elementor and click the Add Template icon or press CTRL+SHIFT+L (I think it’s CDM+SHIFT+L on macOS) on your keyboard.

Step 2
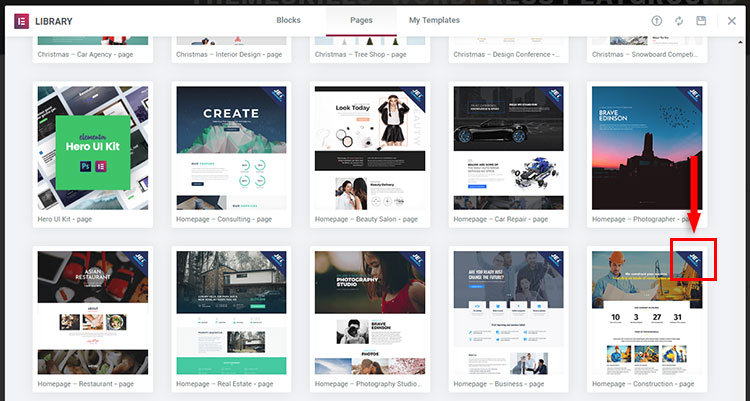
On the Pages tab, you’ll see a ton of pre-made templates from Elementor.
To find the ones from JetElements, scroll at the very bottom and look for the JetElements watermark in the top-right corner.
Step 3
Select a template by clicking on it. Then, click on the Insert button to use it.

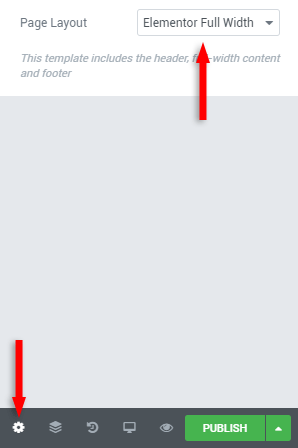
Note that you should use a full-width page template for this.
To do that, access Elementor’s Page Settings by clicking on the gear icon in the bottom-left corner.
Then, change the Page Layout to Elementor Full Width.
3. Pre-made blocks
JetElements also offers pre-made blocks for its widgets (e.g. Banners, Countdown Timers, Headlines, etc.).
Here’s how to access them.
Step 1
Edit a page with Elementor and click the Add Template icon or press CTRL+SHIFT+L (I think it’s CDM+SHIFT+L on macOS) on your keyboard.

Step 2
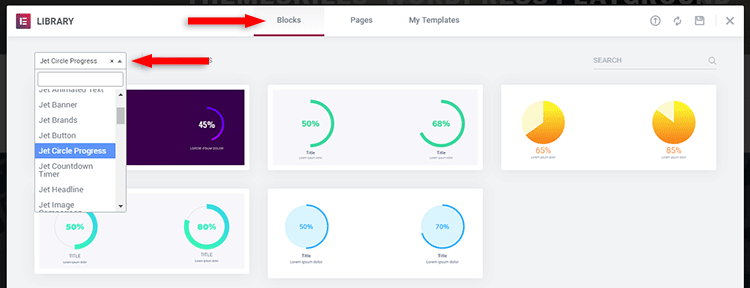
Select the Blocks section and choose a pre-made Jet block from the drop-down category menu.
Step 3
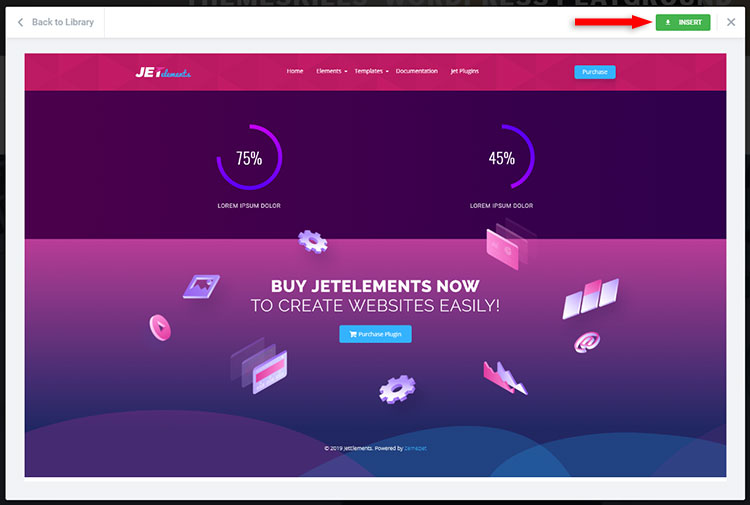
Select one and then click on the Insert button.
JetElements Support
The JetElements add-on for Elementor comes with detailed and updated documentation, which currently consists of a 110-page .pdf file.
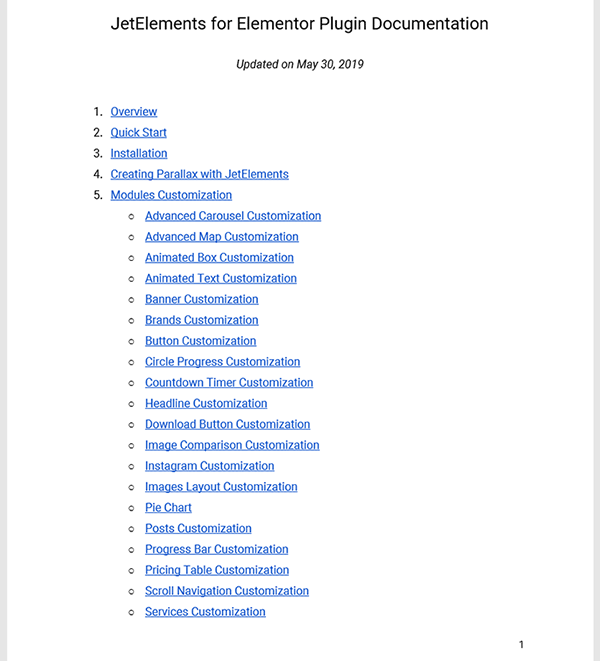
The team also offers 24/7 support for the add-on.
JetElements Pricing
Currently, JetElements costs only $15 (one-time fee) on TemplateMonster.
You can also use this coupon code THEMESKILLS10 to get a 10% discount!
That’s a Wrap
I hope this JetElements review helped you decide if this Elementor add-on is what you’re looking for or not.
If you have any questions or thoughts, drop a comment or send a message via contact or Facebook page.
You can also hit the follow button on Twitter and subscribe to the YouTube channel.
Don’t forget to share the post to help out others!

Leave A Comment