
WordPress themes based on StudioPress’ Genesis Framework (affiliate link) are well known for being properly optimized and for focusing on performance.
Since they’re focusing on delivering optimal performance, the themes won’t be packed with tons of features and options from the start, as other themes are.
So, after installing the Genesis Framework and your child theme, you might notice that you don’t have an option to change the footer text – the copyright and stuff.
In this post, I’ll show you an easy way to do that!
Change the footer text in your Genesis Framework theme
Usually, I tend to recommend using code whenever possible, so you won’t end up installing a ton of plugins for every little customization. The fewer plugins you have, the better!
This time, though, I’ll only recommend using a plugin since the code isn’t the one-size-fits-all type.
Some of you might want different info in your footer, therefore the code will require different customization, which can be confusing and lead to a mess if you don’t have web development knowledge.
The plugin that you’ll have to install is called Genesis Simple Edits, and it’s developed by StudioPress, the creators of the Genesis Framework.
So, you can rest assured that it’s a light, optimized, and compatible plugin.
After installing the plugin, you’ll have the following options, which are found in Genesis -> Simple Edits, on your Dashboard’s sidebar.
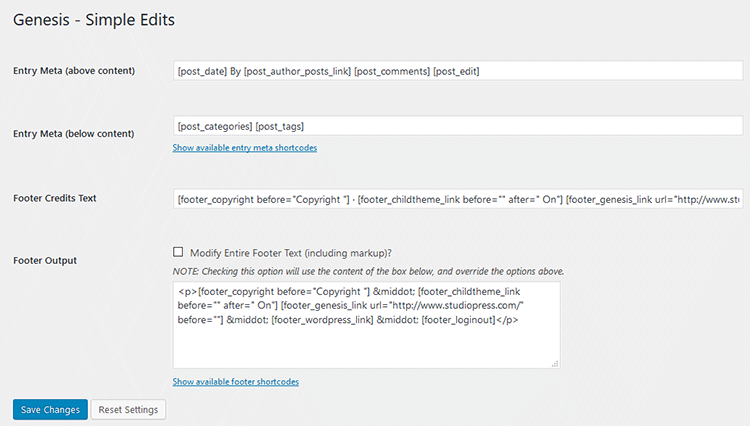
There, you can change the following:
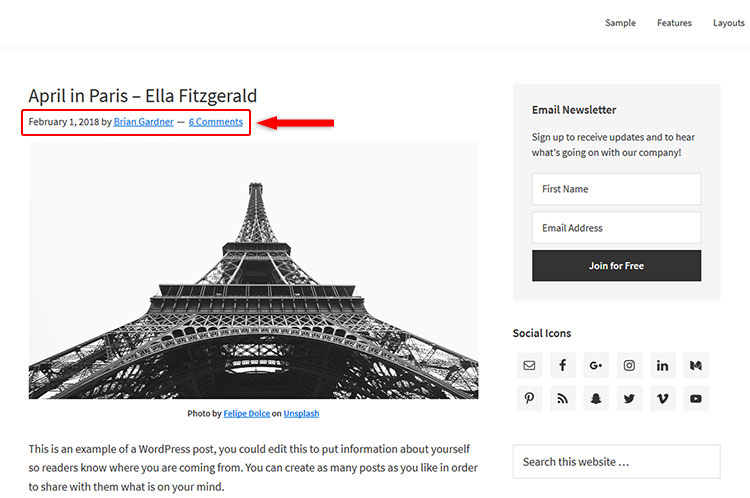
1. Entry Meta (above content) – the meta data that will appear under your title.
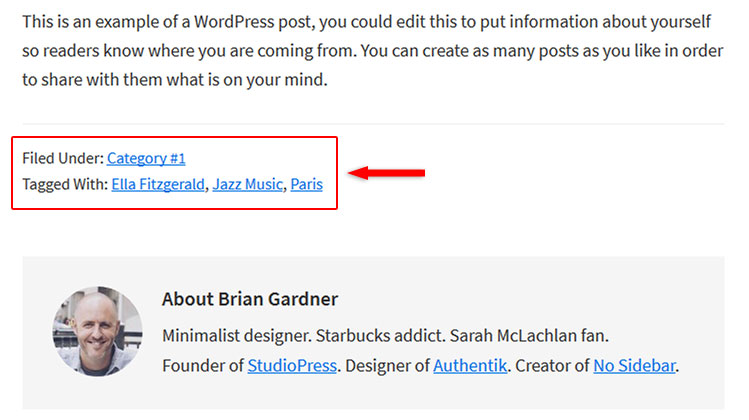
2. Entry Meta (below content) – appears right after your post’s content.
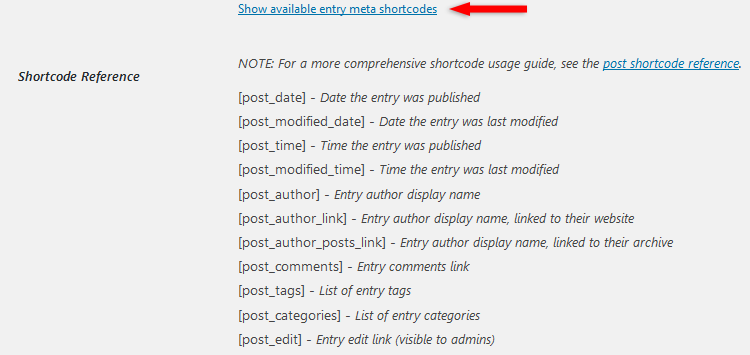
Click on the Show available entry meta shortcodes link to display the shortcodes that you can use for both option 1 and 2.
3. Footer Credits Text.

4. Footer Output – If you want to override option 3 and modify the entire footer text, then enable this option and add whatever you wish.
You’ll need to know a bit of HTML, though.
Or, you can go and create a new post or page (don’t publish it; delete it afterward), use the Visual editor to write whatever you want and add links, then switch to the Text Editor and copy everything that’s there and paste it in the Footer Output box.
This won’t work properly if you’ll use the new Gutenberg editor because in its text editor a lot of other HTML codes will appear.
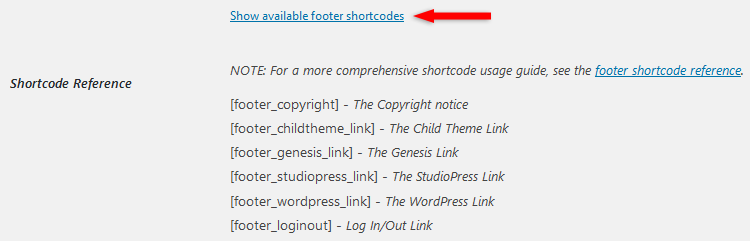
Click on the Show available footer shortcodes link to display the shortcodes that you can use for both option 3 and 4.
That’s a wrap
Hope this tutorial helped you to successfully change your footer text in your Genesis Framework theme.
Don’t forget to share the post to help out others!
You can quickly subscribe to my newsletter by using this link or the subscription form.
If you have any questions or thoughts, drop a comment or send a message via contact or Facebook page.
You can also hit the follow button on Twitter and subscribe to the YouTube channel.
If you want to start your own WordPress blog, or need a website for your business, ThemeSkills’ WordPress setup service is at your disposal! On-going WordPress support and maintenance are on the menu as well!

Leave A Comment