
I created a list of Black Friday and Cyber Monday 2018 WordPress deals, and I needed to add a table.
So, I used Avada’s “Table” element since it also makes the table responsive and all.
But, surprisingly, adding rows to it was not that easy and obvious as adding columns.
Therefore, I decided to write this post and show you how to add rows to an Avada table.
Add rows to an Avada table
Selecting how many columns you want to add to your table is easy, as you can see in the below image.
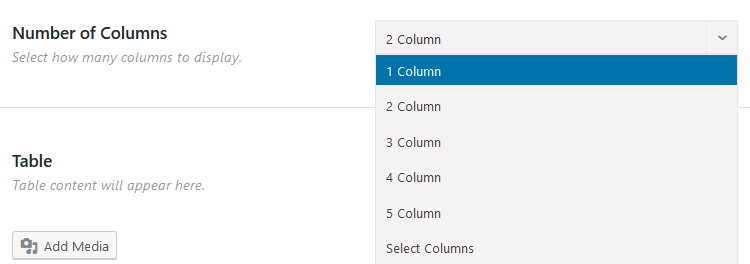
But, there’s no similar option to add rows.
Only one row is added by default.
So, if you want to add more rows to the Avada table, you’ll have to do the following:
Step 1
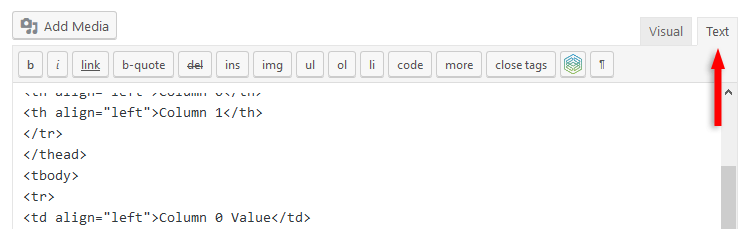
Switch to the Text editor (the one in Avada’s Table element) to access the HTML part of the table.
Step 2
Select and copy the default row.
The row will consist of the <tr></tr> tags and the <td></td> tags between them.
Step 3
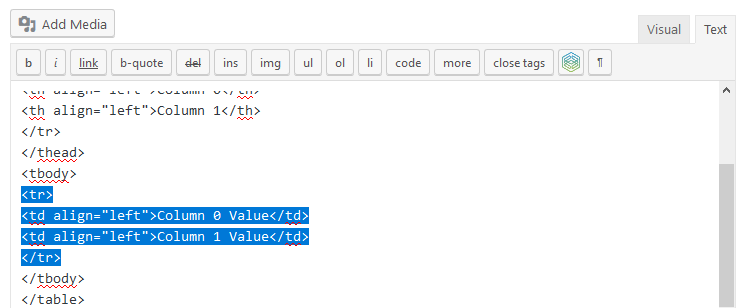
Paste the new row underneath the other row.
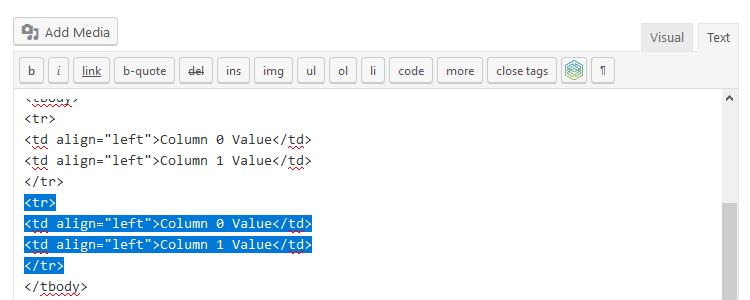
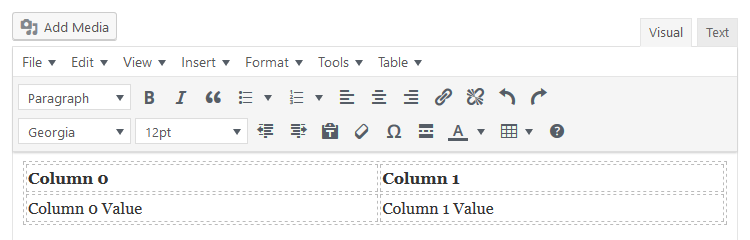
Now, if you switch to the Visual editor, you’ll notice two rows.
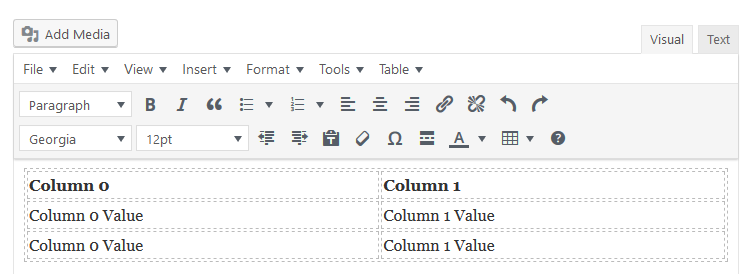
Keep copying and pasting as many rows as you need.
Here’s a gif as well, to see the row duplication in action.
That’s it!
All you have to do now is to edit the text in the table.
You can switch back to the Visual editor or you can edit the text directly into the Text editor.
That’s a wrap
I hope you found the post useful and comprehensive, and you managed to add more rows to the Avada table.
Don’t forget to share the post to help out others!
You can quickly subscribe to my newsletter by using this link.
If you have any questions or thoughts, drop a comment or send a message via contact or Facebook page.
You can also hit the follow button on Twitter and subscribe to the YouTube channel.
My WordPress installation service is at your disposal!
On-going WordPress support and maintenance services are on the menu as well!

But why Avada why?
So silly to half develop this UI
>But why Avada why?
James, what is better universal theme you can offer?