At some point, almost every webmaster will need to access their WordPress website’s files for different reasons: to fix something, add a piece of code to change a feature, backup, etc.
In this post, I’ll tell you how to access and edit your WordPress, themes and plugins files by using 3 different methods.
1. Access your files via WordPress “Editor”
The “Editor” is a WordPress built-in feature that allows you to access your themes and plugins files from inside your Dashboard. You can’t access your WordPress core files from here; check the second and third method for that.
Note: This feature might be disabled due to some WordPress security features or plugins you might use!
Accessing your theme files
- Log in to WordPress, of course.
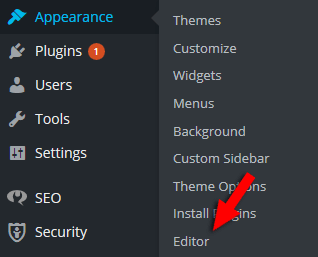
- Go to Appearance -> Editor.
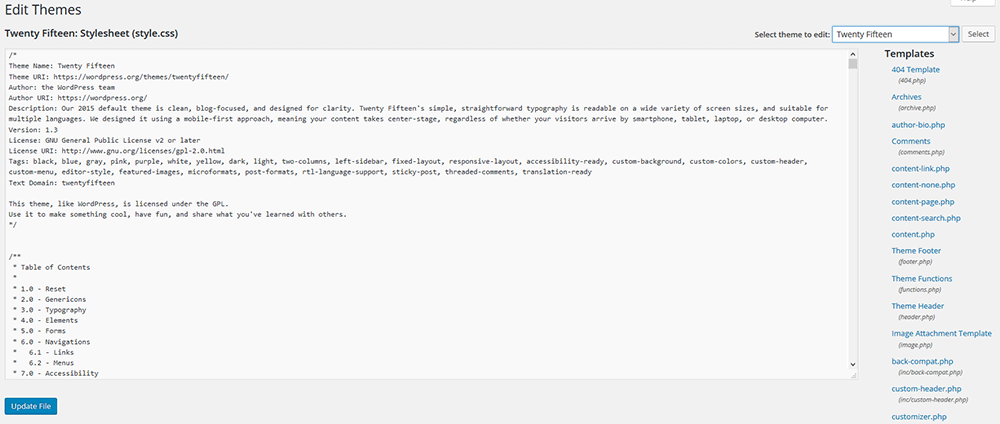
- On the right side, you have your current theme’s files, and on the left side, the area where the file’s code is displayed. There, you can add, remove or modify any piece of code that you want. The files that you’ll use the most will be
functions.phpandstyle.css.
Click to enlarge
I strongly recommend having a child theme in place, otherwise, the changes will get lost with the next update!
Accessing your plugins’ files
- Log in to WordPress.
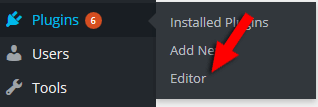
- Go to Plugins -> Editor.
- There, you’ll see that things work like in the Theme Editor. Choose the plugin that you want to edit from the top-right corner, select the file from the right side, and then edit away.
2. Accessing your files via cPanel
cPanel is the most popular and most used control panel, and we’ve always worked with it, as many of you, I assume.
- The first thing you need to do is to log in to your cPanel, which you can usually access by inserting your domain into your browser, followed by /cpanel (e.g. https://yourdomain.com/cpanel).
- Then search for your File Manager.

- Now, you’ll find yourself in the
public_htmlfolder, which contains the WordPress, themes, and plugins files. Directly into thepublic_htmlfolder, you’ll find the WordPress core files, but you usually won’t have any business with them, except if you want to increase your PHP memory limit, for example, which usually fixes some common errors, like the white screen of death error and HTTP error when uploading images.
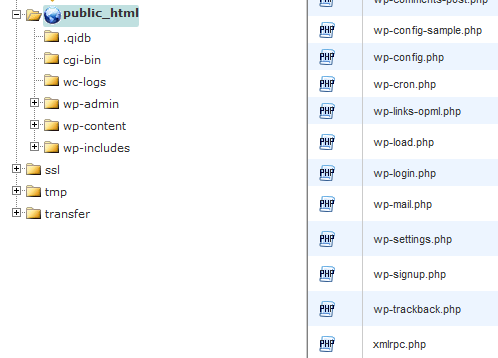
- The files that you’ll access the most will be the themes and plugins files. You can find those by clicking the
wp-contentfolder, under thepublic_htmlone.
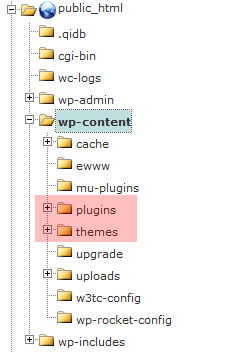
- Now, if you want to edit a theme’s files, for example, just click on the
themesfolder, choose the theme that you want, and search for the file you need to edit. I strongly recommend having a child theme in place, otherwise, the changes will get lost with the next update!
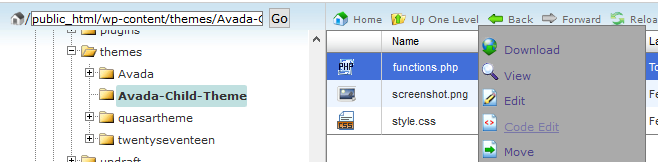
- When finished, press the Save button found in the top-right corner.
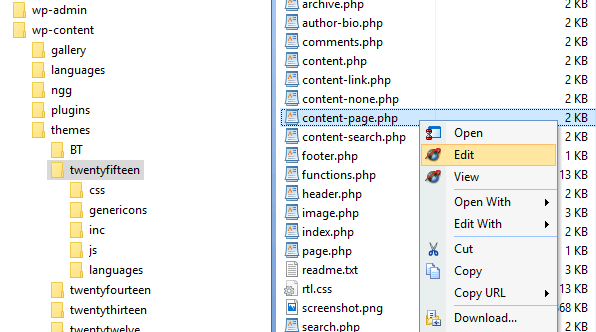
3. Accessing your files via an FTP client
An FTP client is a software that allows you to edit and transfer files back-and-forth between your computer and your website’s server.
The most popular FTP clients are FileZilla and SmartFTP.
I’m using SmartFTP, so I’ll show you how to connect on that one. If you want to know how to connect and use FileZilla, check out their tutorial here.
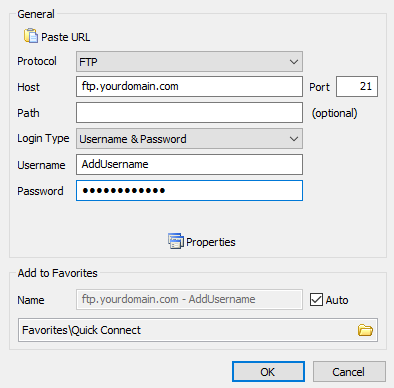
So, in order to connect SmartFTP to your website’s server, you’ll need to go to File and select Connection. Once the connection pop-up appears:
- Insert the Host, which is ftp.yourdomain.com (replace yourdomain.com with your real domain).
- Insert the Username and Password for the FTP. These are usually provided by your web hosting provider after your purchase their services.
- Press OK and you should now connect to your website’s server if everything goes right.
After the connection was created, you’ll notice that the layout is similar to cPanel. The editing process is also similar; just right-click on a file and select “Edit”.
That’s a wrap
Hope you found the post comprehensive and useful! If so, don’t forget to share it with your friends!
If you have anything to say or ask, please drop a comment, or write us via our contact form or Facebook page.
Thanks a lot.