
This is a guest post written by Jyoti Ray. I didn’t receive any compensation for it. You can find out more about Jyoti in the ‘About the Author’ section at the end.
If you have a web hosting for your WordPress website, then you’ll also have access to an FTP feature.
FTP stands for File Transfer Protocol, which is the standard network protocol that is used for securely transferring files between a client and a server on a computer network.
So by using an FTP client, you can easily manage your WordPress website files (edit, delete, etc.) directly on the server. You can find it in cPanel, which is a control panel that most web hosts use.
By default, you already get an FTP account with your hosting plan, but you can also create other FTP accounts if you need to.
If you share your cPanel login details with other people, especially the wrong ones, they’ll have access to everything, so they could damage and/or hack your site.
So, if you create additional FTP accounts for other users, you can give each user different levels of permission to a specific directory. This way they will have limited access to your site.
In this tutorial, I am going to show you how to create an FTP account for your WordPress website, and how you can connect to it.
How to create an FTP account for your WordPress site
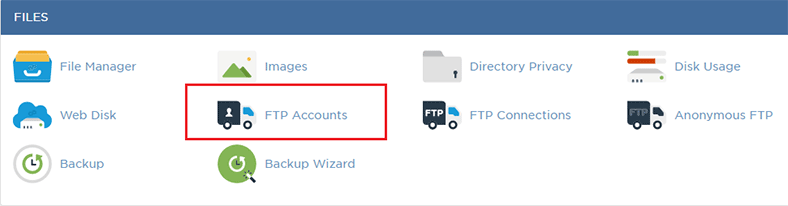
To create an FTP account, first log in to your web hosting cPanel, and from the File section (this location can differ on some web hosts), go to FTP Accounts.
- In the first field (name), type the name of the user. The FTP username will be formatted with your own domain name (e.g. [email protected]);
- Set a Password for the account. This password will be required to log in to your FTP account. You can click on Password Generator to get a strong password;
- Then set a Quota for the account. If you set the quota to 100 MB, for example, then the user can transfer files up to a total of 100 MB. If you set it to Unlimited, then the user can transfer how many files they want, without any restrictions;
- In the Directory field, cPanel will automatically select your domain folder, so you don’t need to provide anything after
public_html/. I recommend you to leave it blank. However, if you want to give access to a specific folder to a user, you can enter the folder name after it (e.g.public_html/wp-admin/); - Now click on Create and you are done! You have successfully created an FTP account.
How to connect to the FTP account
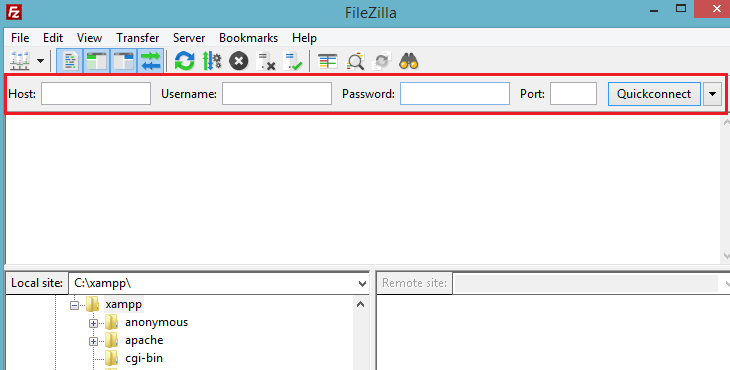
After you’ve created the FTP account, you’ll need to download an FTP client in order to connect to your server, so that you can access your files.
Download FileZilla and install it. Then enter the:
- Host: domain name or server name, which you can find in your cPanel in Account Information;
- Username and password that you have previously created;
- Port. By default, the port is set to 21. Leave the field blank to use the default port;
- Click on Quickconnect.
The left side (Local Site) is your computer and the right side (Remote site) is the website. Now you can easily upload WordPress files, edit them, delete them, etc.
I hope this tutorial helped you understand how to create an FTP account and how to use it!

Leave A Comment