Changing the timezone should be one of the things that you should do after installing WordPress.
This is a built-in feature that comes with WordPress, so it’s very easy to change.
Setting the proper timezone is important for when you’ll schedule posts, set calendar features, and many other things.
Click here if you want to jump straight to the video tutorial.
Change the timezone
In order to do this, you have to:
- Log into WordPress;
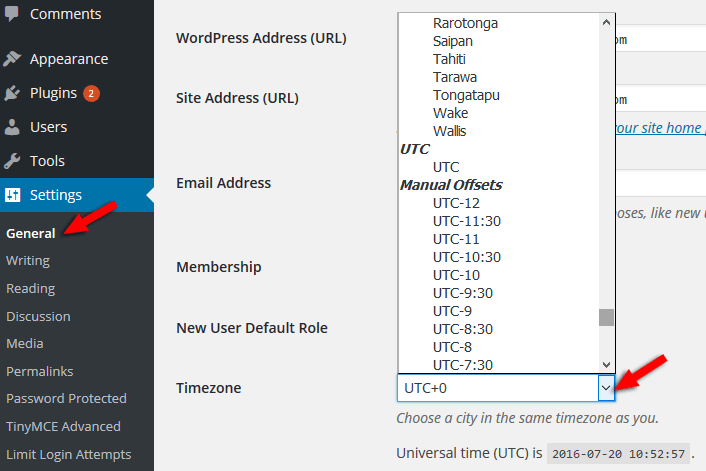
- Go to Settings -> General;
- Go to Timezone and select the proper one for you;
- Press Save Changes.

You can either select your city or a city with the same timezone as yours, or you can select the UTC (Universal Time Coordinated).
In order to find your country’s / city’s UTC, use a site like http://www.timeanddate.com/.
Video tutorial (HD)
That’s a wrap
Hope you found the post useful!
Don’t forget to share it with your friends!
If you have any thoughts or questions, please leave a comment, use our contact form, or send us a message on our Facebook page.


Hi,
Be sure to sync the changes you made in WordPress to your CoSchedule account. Go to the Settings > WordPress page for your blog. Under \”Connection Details\” click on Refresh Connection.