
This post was last updated on 12/29/2018 to add guidance for the Gutenberg editor as well.

The ability to change the font size in WordPress doesn’t come by default. You either need to install a plugin or use some HTML, if you are a bit more advanced and like to use the Text editor.
It does now if you use the Gutenberg editor. You can select the text block and change the font size in the right sidebar.

In this article, I’ll show you how to change the font size in WordPress by using both a plugin and HTML.
Please note that these techniques should only be used occasionally! For example, if you want to make a paragraph bigger on a post once in a while.
They are inefficient if you’re planning to change the font for an entire page or website, or for different paragraphs across multiple pages or posts.
For more extensive and frequent text styling, you’ll have to use your theme’s options or CSS classes.
Change the font size in WordPress using the TinyMCE plugin
Before I get to the plugin, I want to point out a mistake that some people make, which is to use the Headings feature to write content/paragraphs.
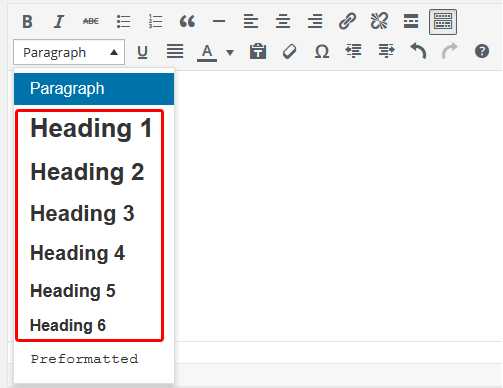

As you can see in the above image, in your Visual editor, you can select headings from 1 to 6.
If you care about SEO (Search Engine Optimization), never write paragraphs using them. They should only be used for titles and sub-titles.
The best practice is to have only one H1 heading on your page, which should be the main title/topic of your post/page, and the rest of them should be H2, H3, and so on.
There’s quite to talk about when it comes to a proper headings structure, but we won’t cover that in this article. You can find out more info here, though.
Now, back to our plugin.
For the Classic Editor
The TinyMCE Advanced plugin will enable a lot of features, which will be very useful, especially for beginners.
After you install the plugin, you’ll need to go to Settings > TinyMCE Advanced, and drag the Font Sizes button from the Unused Buttons to the toolbar.
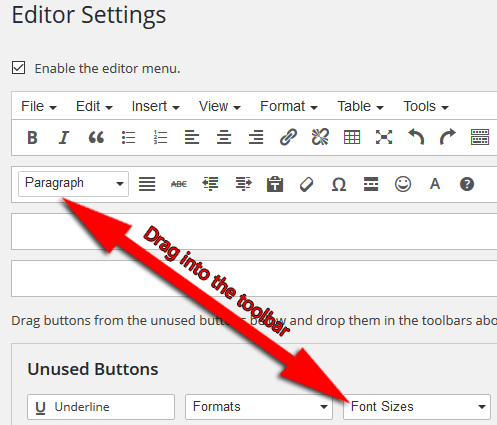
Press Save Changes and open a new or old post to see how it looks like.
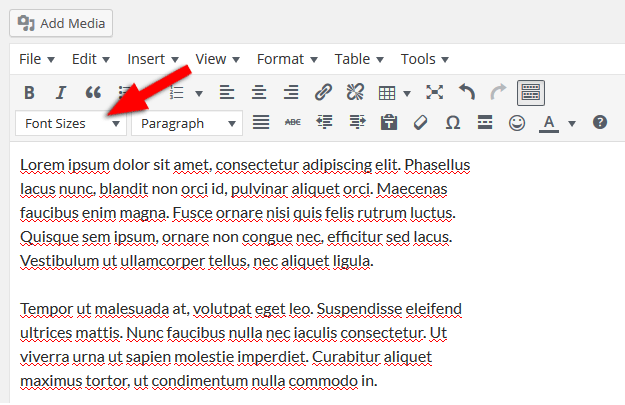
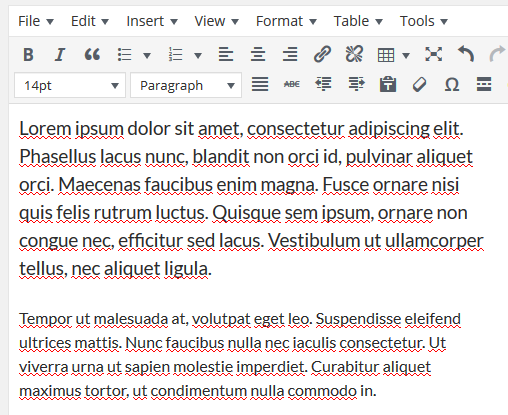
As you can see, a drop-down appeared from where you can select your font size. Let’s enlarge the first paragraph to see how it will look like.
First, select the paragraph, and then choose the desired font size from the drop-down:
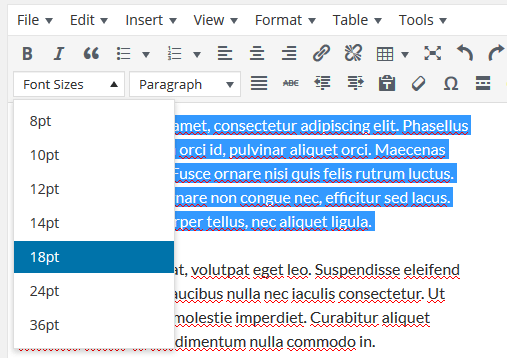
And voilà!
For the Gutenberg Editor
After you install and activate the TinyMCE Advanced plugin, go to Settings > TinyMCE Advanced > Toolbars for the Classic Blocks in the Block Editor (Gutenberg) > drag and drop the Font Sizes button into the toolbar.
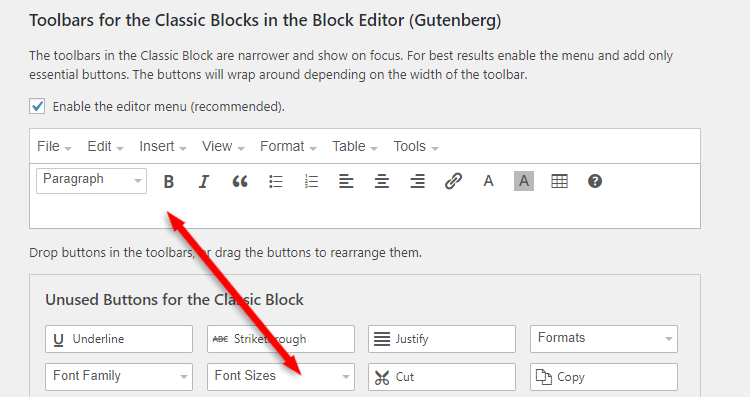
Now, when you’ll write a post, a toolbar will appear, where you can select your text > click on the Font Sizes button > select your font size.

Change the font size in WordPress using HTML
Using the Classic Editor
This is more for people that don’t like using the Visual editor, preferring the Text one and are also more advanced when it comes to WordPress and HTML.
But, since we’re only talking about a very simple piece of HTML code (plus inline CSS), even beginners can use it.
So, once you’re in the Text editor, insert this code right before the piece of content that you want to enlarge: <span style="font-size: 14pt;">.
Then, add this at the very end of the text that you want to enlarge: </span> – this is the closing tag.
Note: You can use whatever sizes you wish instead of that 14pt; that was just a random number for the sake of the example. You can use 15pt, 16pt, 23pt, 45pt, etc. You can also use ‘px’ or ’em’ instead of ‘pt’.
Here’s an example:
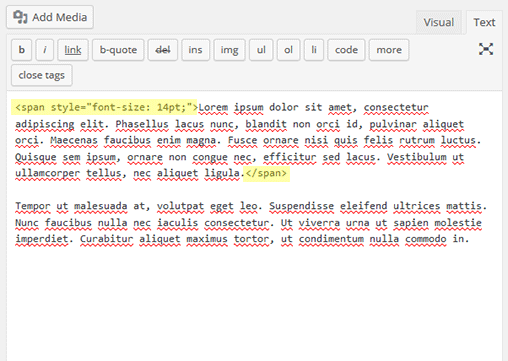
Now that paragraph will have the font size of 14pt.
Using HTML will also come in handy if you want to use other font sizes, rather than the ones offered by the TinyMCE plugin, or bigger than 36pt.
Using the Gutenberg Editor
To change the font size in the new WordPress editor using HTML, you’ll have to select the block > click the 3 vertical dots > click Edit as HTML.
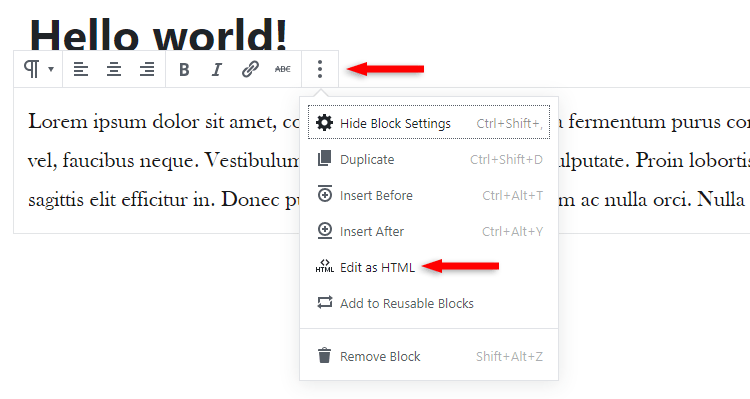
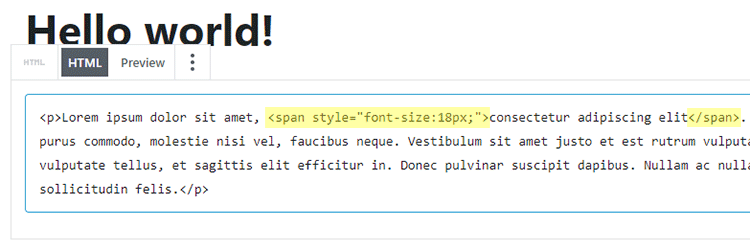
There, add the text that you want between <span></span> tags, like this:
<span style="font-size:18px;">text goes here</span>
If you want to change the size of the whole paragraph within the block, then add the style attribute inside the first <p> tag (which will appear automatically), like this:
<p style="font-size:18px;">paragraph goes here</p>
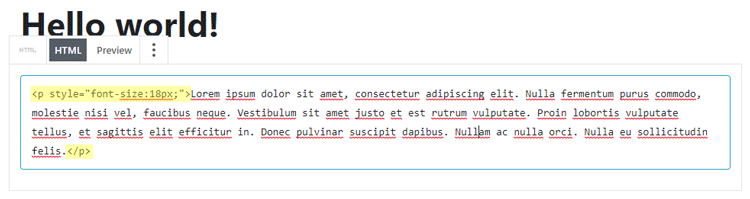
So, you don’t need to use the <span> tag anymore if the changes will be made to the whole paragraph, not just for a piece of text within it.
That’s a wrap
Hope you found the post useful and managed to change the font size in WordPress using one of those methods.
Don’t forget to share it with your friends!
If you have any questions or thoughts, please drop a comment, contact us, or message us on Facebook.

Thank you a lot, I’ve been looking for this because the font on my blogs is too small I have come to find. Actually I thought I would need to get a new theme, but using this html-code is simple and all enough maybe. So thanks!
Cheers, Chris
I am already using TinyMCE Advanced plugin. It is an awesome tool to manage WordPress visual editor. This post is very helpful for the beginners.
Take care,
All the best.
Thank you so much for this information it ‘s helpful.
Hi,
Thanks for sharing such an important article.
I have used it and its really working, thanks a lot for sharing a simple and easily understandable blog. It is very helpful for all.
Thanks for the post. I got your point. But I want to know more… I want to make the bigger size of some special word in a sentence without any plugin. Special words in a sentence. Like we are doing in MS word. Can it possible? Hope your answer.
Hello!
If you don’t want to use a plugin, then use the HTML code I provided in the article. Wrap any word in that, and you’ll increase its size.
that code helps, thanks
Hy, I’m using 14pt size in my posts. what is a problem using this font size? tell me bro i’m waiting
Hello! I don’t see any problem with that…
How do I style it ? I want something like italic and other type of font style. Not size.
You’ll need TinyMCE Advanced for both your requirements since it will be easier.
For italic, select your text, then go to Format and select Underline. If you want to change the font, you can do so by selecting another one from the font drop-down menu. If it’s not there, go to TinyMCE’s settings and drag it to your toolbar like you see in the screenshot.
Thanks for the code. You saved my day:)
You’re welcome! I’m glad it helped you! :D
How can I change the font size of all of my blog posts? I have already install TinyMCE Advanced plugin but I need to change my all blog posts.
If you want the font size changed only for blog posts, then this should normally work if your theme doesn’t use other CSS classes:
.single-post .entry-content p {font-size: 18px;}Add it in Appearance > Customize > Additional CSS.
Change
18pxwith whatever value you wish (e.g. 16px).